09 Mar North Inlet – Tonahutu Creek, Rocky Mountain National Park


guides // backpacking // colorado
North Inlet – Tonahutu Creek Loop, Rocky Mountain National Park, Colorado
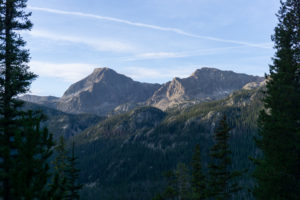
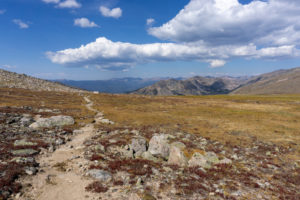
The North Inlet – Tonohutu Creek Loop takes you straight through some of the most unique, high-alpine environment in the Rocky Mountains — and it’s not actually that difficult for a three- to four-day trip. You’ll start at the base of Grand Lake and hike through lush forests and expansive meadows. Once you get above tree line, you’ll feel like you’re in an entirely different world. The grass is squishier, the sun bears down harder, and none of the landscape colors make sense. Out of all the high alpine environments we’ve backpacked, this trip mystified is the most because the terrain was like nothing we’d ever seen.
Quick Notes
Pictures taken September 2018
Total Distance: 26.6 miles
Elevation Gain: 3,911 feet
Difficulty: Medium
Days: 2 Nights
Hike Type: Loop
Trailhead: North Inlet / Tonahutu Trailheads
Seasons: Summer & Fall
Permit Requirement: Yes, Year-Round
Camping: Designated Camping
Map: National Geographic Rocky Mountain National Park
Water: Filter along the way


When to Go
This is one of those high-elevation trips that you’ll have to wait for the snow to melt in order to hike through. The trail is usually passable by July, but you may still see scattered snow into late summer. We went in early September and saw a couple snowfields at the super-high elevations. During our year, Colorado had had one of the hottest summers on record so I think that’s why the grass in the pictures is mostly yellow and brown. On wetter and less scorching years, the terrain looks a bit greener.
Even though this trip isn’t great for winter, there’s a couple other more doable snowshoe trails nearby that you can try out instead. Click here for a list of winter camping zones on this side of the park. Also, if you want to learn more about winter backpacking, I’ve got a whole series of articles that should get you sorted.
Also, if seeing elk is your thing, you should go in the autumn during elk bugling season. This is when all the male elk scream at each other in competition for the beautiful lady elk. The elk are also supposed to be a bit easier to spot during bugling.

Trip Cost
Park Entrance Fee*
Wilderness Permit Fee
$35 per vehicle for 7 days
$30
*If you know that you’re going to be going to a national park more than three times in a year, it’s worth it to buy a National Parks Pass. They’re $80 and sold online, at all REI locations, and National Park Visitor Centers.
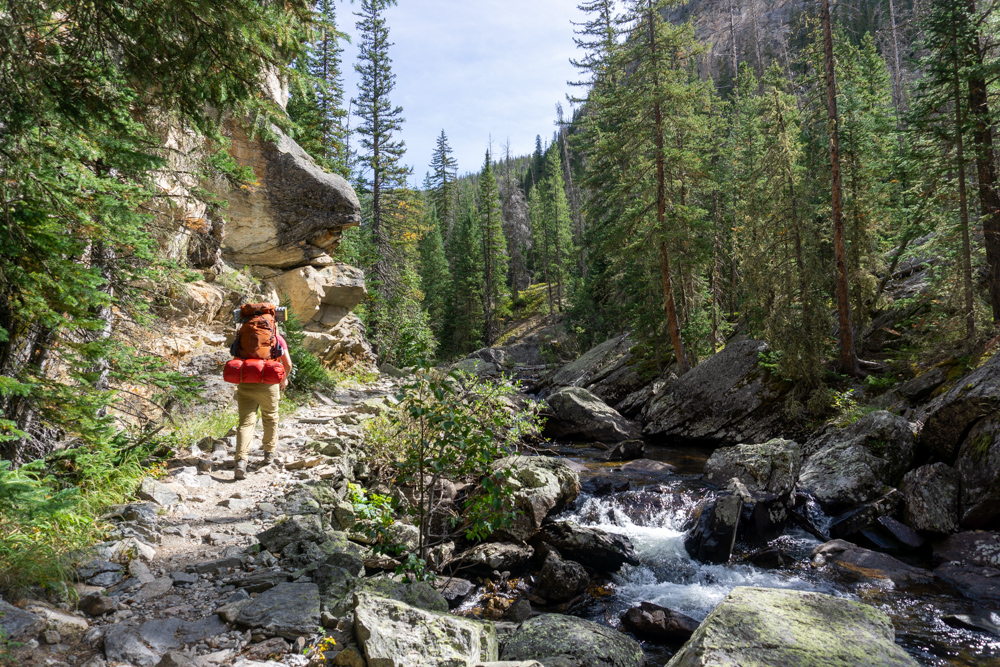
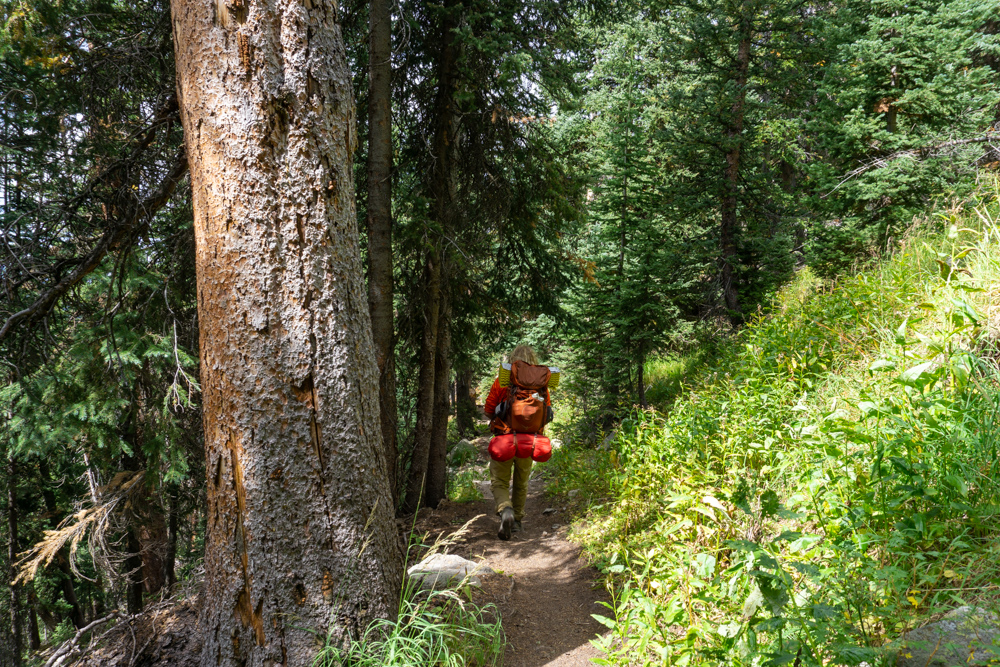
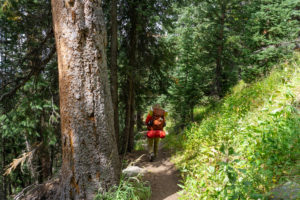
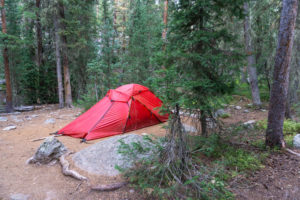
The ~ lush ~ trail along North Inlet Creek.
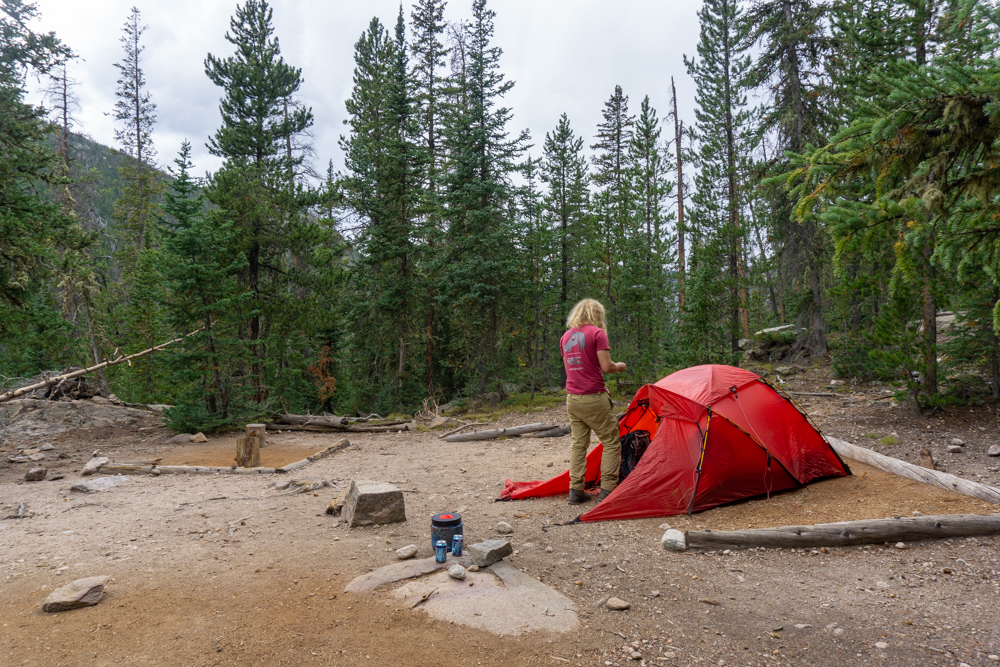
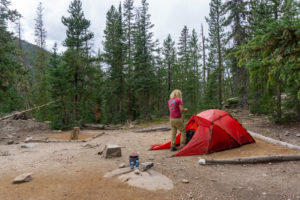
Cozy North Inlet Junction campground.

Before You Go
The first thing you need to do is to decide which direction to hike the loop. Surprisingly, the elevation profile in both directions is quite similar. In both directions, the trail starts off gradually uphill and then gets steeper until you reach the highest part of the loop around the middle. There also aren’t any super-steep downhill or uphill climbs in either direction. Aside from the trail, it seemed like the views were pretty similar from both directions, so you can just coin toss for which direction to take and have the other one as a backup.
After you choose your loop direction, you can choose your campsites. The park has created 33 designated campsites along this loop that you have to reserve with your permit (more on that later). The campsites are all below the tree line, so you won’t be camping with any crazy views. On the bright side though, the forest is pretty cozy and the campsites are nicely set up with “camp furniture.” For a map of backcountry campsites and for Rocky Mountain National’s wilderness camping guide click here and here. For reference, we did the trip counter-clockwise and we camped at North Inlet Junction and Lower Granite Falls.
Next, you’ll need to reserve a backcountry camping permit. The park requires all overnight visitors to carry a permit and as usual, it’s easier to get a permit if you make a reservation. Plus, this trail seems like it would be very popular (and hard to get a permit for) in the summer because it’s such a convenient loop. If you don’t end up making a reservation, you can still grab a walk-in permit, but the park doesn’t automatically save any of the total permits for walk-ins. Because of this, you might have to make a quick pivot to a different trail with available campsites.
Rocky Mountain National Park accepts backcountry permit reservations from March 1st to October 28th every year. You just follow the instructions in this form, fill in your trailheads and other information and pay the fee. You’ll get an e-mail once the park processes and approves your permit request. Right before your trip, you’ll need to swing by the Kawuneeche Visitor’s Center just north of the trailhead to pick up an official paper copy of your permit and a dash tag for your car.

Getting There
The easiest way to get to the trailhead is from the south entrance to the park. If you come it from the East (through Estes Park), you might hit tourist traffic driving along the scenic and super-high-elevation Trail Ridge Road. This road is particularly busy on summer weekends, so it might be worth it to go around to the south entrance, especially if you’re coming from Denver.
Before you head to the trailhead, you’ll need to stop by the Kawuneeche Visitor’s Center to pick up your permit. The visitor’s centers is on US-34 (aka Trail Ridge Road), just a couple miles north of the south entrance to the park.
Once you grab your permit, you can head back south on US-34 and then turn left on West Portal Road through the town of Grand Lake. Finally, turn left onto Road 663 all the way to the trailhead. The parking lot has around 25(ish) spots and a compost toilet. It wasn’t too full when we pulled into the parking lot, but it seems like it could easily fill up on a busy summer weekend.
Now you just need to remember to display your parking dash tag on your car and you’re ready to hike!
Also, there aren’t any good places to pick up last minute supplies once you’re inside the park, so you’re last chances to shop are in Grand Lake and Estes Park.

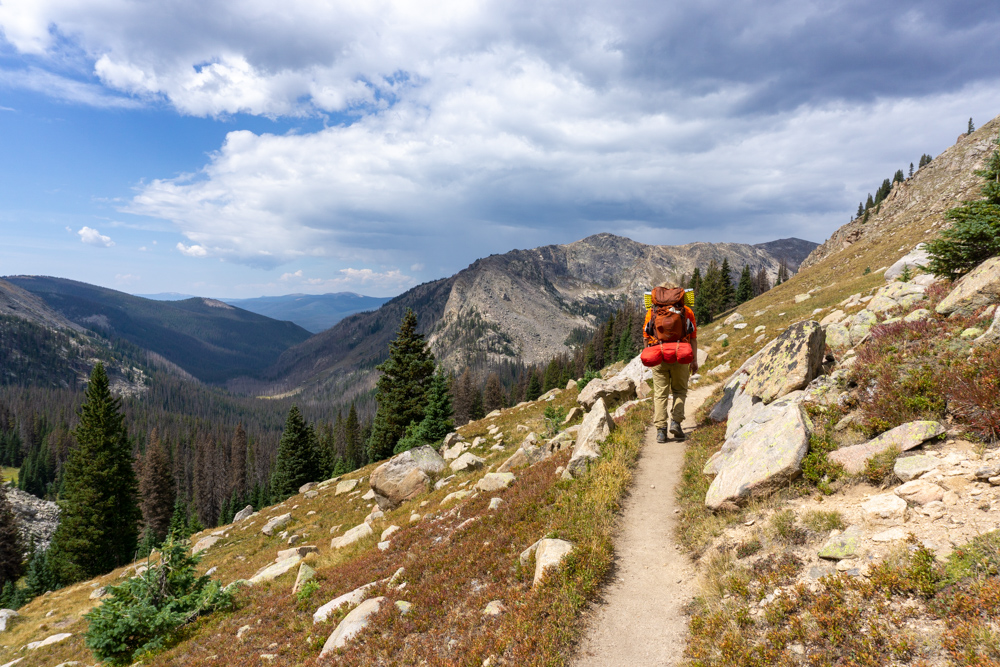
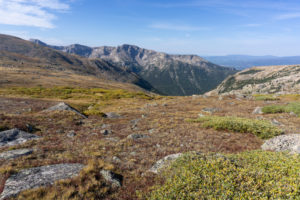
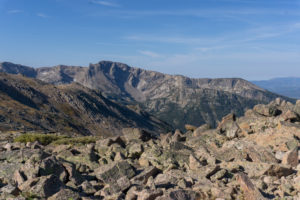
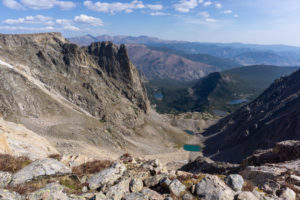
One of many views from the top of the ridge.

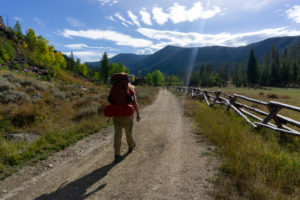
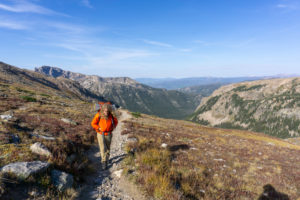
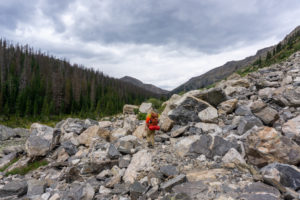
Artsy backpacking picture during a well-deserved rest stop.

On the Trail
We did the trip counter-clockwise so that’s what I’m describing here:
The trail starts out right next to a pastoral-looking wooden fence that delineates the park boundary. This is by far the easiest and flattest part of the journey. After about 1.3 miles, things get a bit steeper as the trail hugs North Inlet Creek. You’ll stay with North Inlet for the next 6 miles.
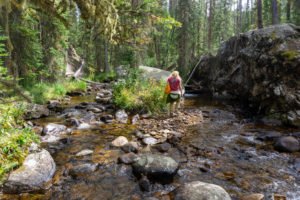
The North Inlet stretch of trail is magical because the plant life surrounding the creek is so dense and intensely green that it’s border-line tropical. In this area, the miles melted by. After about 7.3 miles from the beginning, we set up camp at North Inlet Junction. This campground wasn’t near anything that exciting, but we took the trail south towards Lake Nanita and found a pretty cool medium-sized waterfall.
The next morning we hit our first major set of switchbacks right after we left camp. After about 1 mile from the campground, we finally found ourselves above tree line for some exciting mountain views. The trail stays above tree line for the rest of the day until it descends back down into the forest where you’ll find the first cluster of campsites.
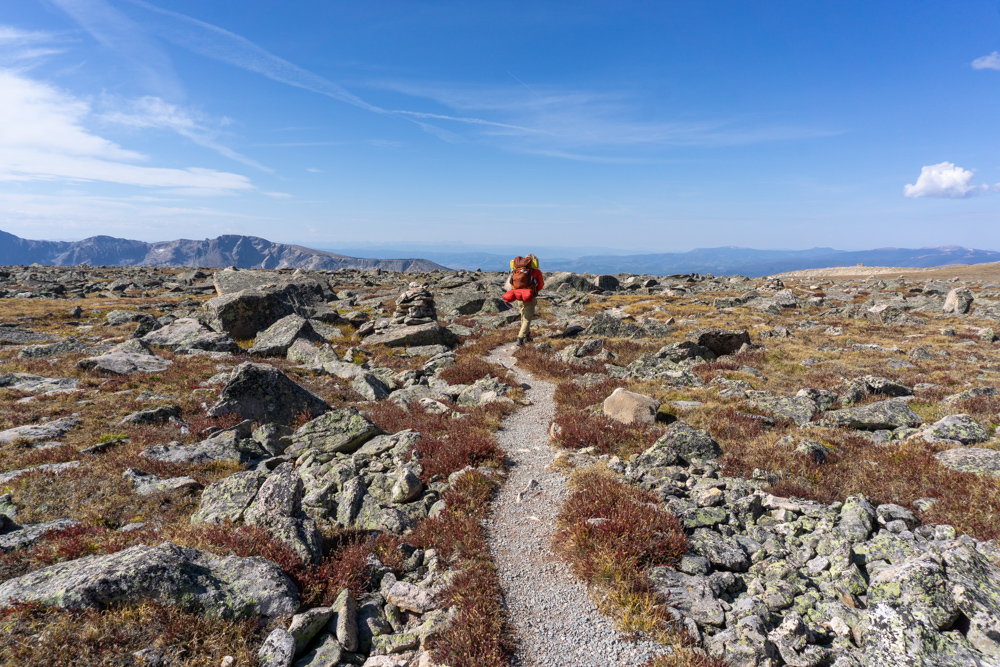
The section of trail above tree line felt like true alpine tundra. We even saw a group of elk crossing a snowfield in the distance. You’ll hike through a scattered boulder field and endless spongy “ice grass,” which is a special kind of high-alpine grass that only grows in the Rocky Mountains, the Andes Mountains and Greenland. You’ll also get amazing views of the surrounding peaks the entire time. This 6-mile section of trail was definitely my favorite of the trip. I wish the park let people camp on the ridge, but I think the grass is too sensitive to be squished down by campers.
Unfortunately, the trail eventually dips back under the trees and the designated campsites start popping up. There’s four campsites in the first cluster and they’re all tucked into the dense forest. Our permit was for the Lower Granite Falls campsite, so we hiked until we found it and set up camp for the night. This campground wasn’t anything special — no crazy view or beautiful creek. We did have a decent stump to play “who can spin and land the knife into the stump,” so there’s that. We were pretty exhausted though after our big-mileage day, so we eked out our last bit of energy on cooking and then instantly passed out.
The rest of the hike past the campsites was an easy downhill jaunt. We were hungry for some real food so we practically jogged ourselves out. On the way out, you’ll walk/jog past a bunch of trees and a couple serene-looking meadows. During elk bugling season, I could see a lot of these meadows being prime elk mating grounds.

After the Hike
With the town of Grand Lake being right there at the trailhead, you’ll almost have too many tasty options for breakfast or lunch after your trip. We really liked breakfast at Sagebrush BBQ & Grill. We fully enjoyed their bacon and apple pancake special. Other than food, Grand Lake has all the normal souvenir shops you’d expect from a town next to a National Park.
Supply List
The Usual List
Backpack
Tent
Sleeping Bag
Sleeping Pad
Sleeping Bag Liner
Camp Stove
Lighter or Matches
Cooking Pot
Food
Water Vessel
Water Filter
Headlamp
Clothing
Trip Specific Things
Bear Canister
The park requires you carry one. It keeps bears and other forest friends from getting into your food and other smelly things. We use the BearVault BV450 Food Container and we love it. It’s durable, light and fits all of our food for two to three day trips. If you don’t own a bear canister, you can rent one from the Kawaneeche Visitor Center.
SMART Water Bottle with Small Sawyer Filter
This trail has fairly consistent access to creeks and streams along the way. On trails with consistent water access, we usually just fill up a SMART water bottle, screw in the Sawyer filter and drink straight from the filter spout. It saves us time, and makes it to where we don’t have to unpack our entire backpack to get to our water reservoir. Why specifically SMART water bottles? They’re durable and somehow one of the only bottles that the Sawyer filter is compatible with.
Rain Jacket
You’ll be very prepared for the daily 2pm mountain thunderstorm.
Thinking about doing this trip? Have any questions? Comment down below!
More Happy Packers
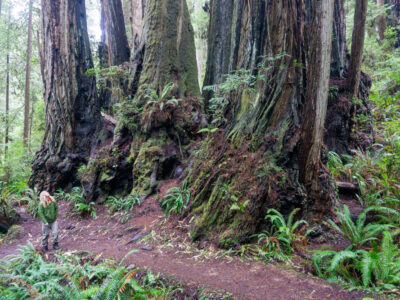
This loop is a tour through the many wonders of Redwood National including the famous big trees, a moody beach, and the mystical Fern Canyon.

This is the perfect any-season beginner trip for anyone wanting to dip their toes in backpacking.
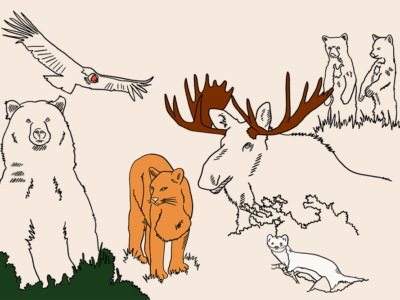
Animals in the wilderness can be scary, but they don’t have to be. Here’s how to feel perfectly at home with the bears and mountain lions.