14 Dec Crater Lakes Trail – James Peak Wilderness


guides // backpacking // colorado
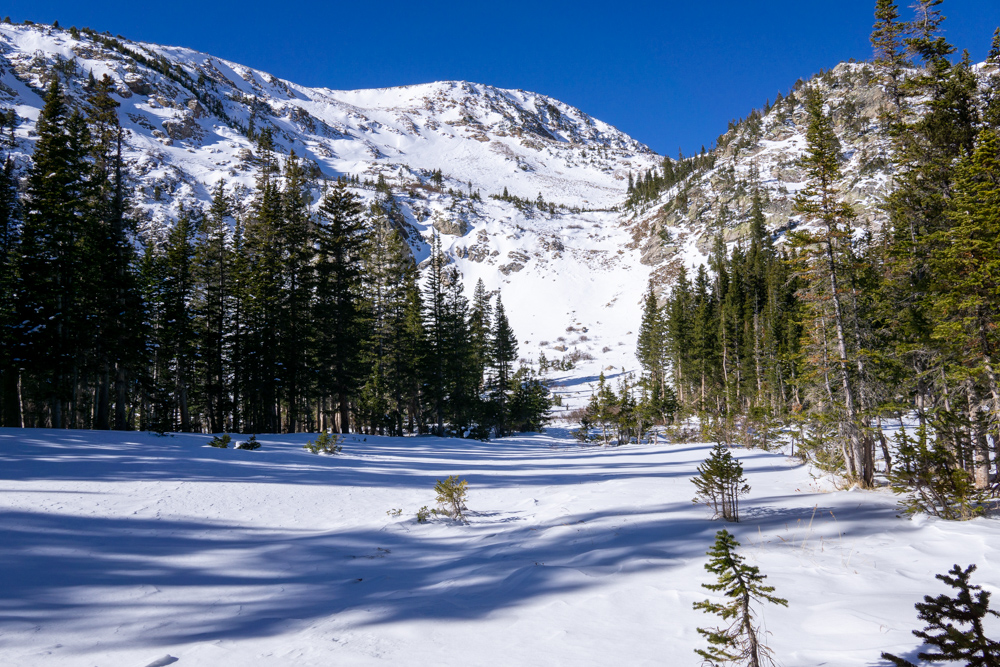
Crater Lakes Trail, James Peak Wilderness, Colorado
If you’re looking for the perfect beginner backpacking trip for any season, the Crater Lakes Trail in the James Peak Wilderness is it. This hike is super-short, doesn’t have a lot of elevation gain, and you’ll be camping at one of three beautiful high-alpine lakes. Based on how much you want to push yourself, you can either choose to camp at one of the lower Crater Lakes or you can press on to windswept and exposed Upper Crater Lake. The best part is that the James Peak Wilderness has no reservation or permitting process, so you just drive right up to the trailhead and start hiking.
Quick Notes
Pictures taken November 2020
Total Distance: 5.5 to 6.3 miles
Elevation Gain: 1,350 to 1,760 feet
Difficulty: Easy/Medium
Days: 1 Night
Hike Type: Out-and-back
Trailhead: Moffat Tunnel – East Portal / Heart Lake Trailhead
Seasons: All
Permit Requirement: No
Camping: Dispersed Camping
Water: Filter along the way


When to Go
As you can tell from the photos, you can do this trip year-round. In the summer and fall, it’s a super-easy beginner trip that’s pretty enough to inspire more backpacking trips. In winter and early spring, it makes for a good entrance into the world of winter backpacking. In late spring, it’s probably a muddy mess and best avoided.
The only drawback in the summer is that the camping spots are not too far from the trailhead, so you may have trouble finding a campsite with privacy from day hikers. The best move to get a secluded campsite would be to camp on the lake bank opposite the trail or to hike the extra 0.4 miles up to Upper Crater Lake. Surprisingly, even in the winter, we were seeing more visitors than we normally expect around our campsite.

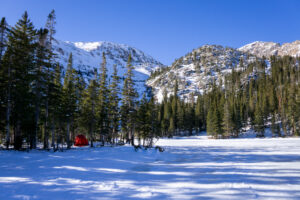
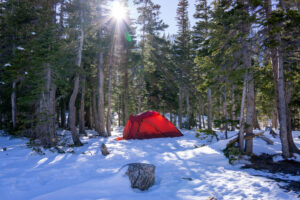
Our cozy tent through the trees.

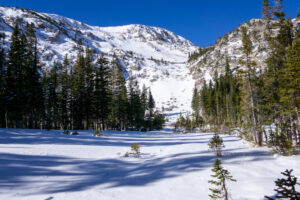
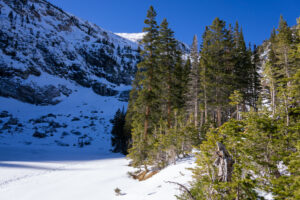
The southern-most Crater Lake.

Before You Go
There’s nothing to do before you go — no permit, no reservations, you don’t even really need to worry about parking because the parking lot is quite large. If you want to do some research about the area or its wildlife, you can check out the National Forest website.

Getting There
The trail begins at the end of an 8-mile dirt road that has at least different three names: East Portal Road, Rollins Pass Road and forest road 16. If you type “Moffat Tunnel East Portal TH Parking Lot” into your map app of choice, you should be fine.
Depending on which direction you’re coming from, you’ll have two different options for picking up last minute supplies. Rollinsville is the closest town to the trailhead, but there’s nowhere to pick up food or supplies in town. If you’re coming from the north along highway 119, the closest grocery store is in Nederland. If you’re coming from the south, your best option is a convenience store called Taggert’s, which is around a 12 minute drive from Rollinsville.
The trailhead is so close to home for us, that we didn’t end up stopping anywhere. Ultimately, I think the best option would probably be to stock up in Denver or Boulder.
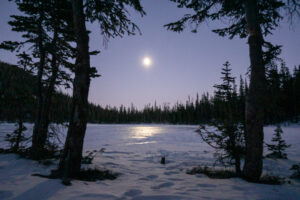
I snapped a quick ~night~ photo from the inside of our tent.
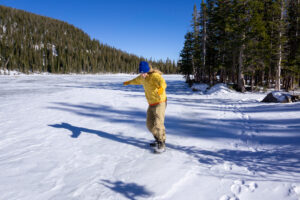
Ask me how many times we slid across the frozen lake.

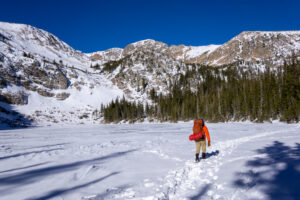
On the Trail
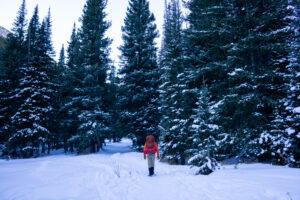
The trail starts out at the Heart Lake Trailhead and heads right into the forest. The first 1.5 miles of the hike are on the South Boulder Creek Trail, which makes its way all the way across the James Peak Wilderness. Early on, you’ll see the Moffat Tunnel and an abandoned-looking house. In this first 1.5 miles until the junction with the Crater Lakes Trail, the trail is slightly uphill, but it’s nothing too steep.
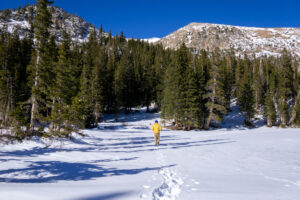
At the junction with the Crater Lakes Trail, turn right. We noticed that even with some snow on the ground, the sign was easy to spot; however, you’d have a hard time finding it with more than 3 feet of snow. After turning onto the Crater Lakes Trail, you’ll hike another 1.0 mile to the first lake. The actual trail straddles the hill between the two first lakes, but in the winter, previous hikers had veered the trail south onto the frozen lake. Luckily, the trail didn’t cross the lake, it just skirted the north bank — but we were definitely walking on frozen water. We could have still followed the original trail, but we would have had to break the trail ourselves by post-holing.
During our hike, we did a little extra back-tracking, because we followed the tracks of other hikers onto the frozen lake, but then second-guessed ourselves after checking the GPS. We walked back to the spot where the actual trail veers onto the hill, but never found a good way to pass through without post-holing. We ended up going right back to the frozen lake, making our way across, and then heading north to the south-western bank of the northern lake.
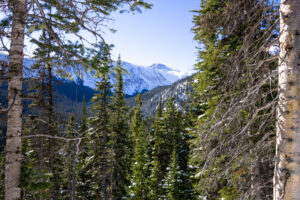
By the time we got to the lakes, it was cold and windy, so we didn’t attempt the steep hike up to Upper Crater Lake. We ended up finding a cozy grove of trees right next to the northern lake where we could get some cover from the wind and some nice views. The lake was so frozen that we were almost able to walk all the way to the center of the lake.
After a frosty, sub-zero night, we crammed our feet into frozen boots and hiked out the same way we hiked in.

After the Hike
This trailhead is so close to home for us that we drove straight home after the trip and ate lunch there. If you’re curious about the food scene around Nederland and Eldora, most of the food is found in Nederland. In Nederland, you’ll find the usual fare like pizza, sandwiches, bakeries, a brewery and Indian, Thai, and Mexican food. The food looks surprisingly good and varied for a town of around 1,500 people.
Supply List
The Usual List
Backpack
Sleeping Bag
Tent
Sleeping Pad
Sleeping Bag Liner
Camp Stove
Lighter or Matches
Cooking Pot
Food
Water Vessel
Water Filter
Headlamp
Clothing
Trip Specific Things
{Summer Stuff}
Bear Canister
The park doesn’t make you carry one, but it’s convenient for keeping bears and other forest friends from getting into your food and other smelly things. We use the BearVault BV450 Food Container and we love it. It’s durable, light and fits all of our food for two to three day trips.
Rain Jacket
You’ll be very prepared for the daily 2pm mountain thunderstorm.
{Winter Stuff}
Assembling a backpacking kit during the winter is a bit more involved than during the warmer months. Click here, for a full lesson on how to upgrade your regular kit to a winter kit. Here’s a cliff-notes version:
Winter Hiking Trails Map and Strava App or Hiking Project App
Without this map and a back-up app, we’d probably still be wandering around the park. Seriously, winter navigation is hard and you’ll need some good tools to help you figure it out.
Sleeping Pad
We bring our sleeping pads on almost every trip, but it’s extra important to bring a sleeping pad on trips where you’ll be sleeping on snow. The sleeping pad elevates you off the ground and most sleeping pads are made of a material that reflect your body heat back at you. On our first snow trip ever, I had this idea that snow is “soft” and I didn’t need my sleeping pad – don’t be like me. I froze, slept no hours, and it was not fun.
Sleeping Bag Liner
After having a good sleeping pad, the next piece of gear to upgrade for winter travel is your sleeping bag, but good sleeping bags can get expensive. I recommend adding a sleeping bag liner into the mix before upgrading your sleeping bag. Sleeping bag liners can improve the rating on your sleeping bag by 20°F and cost way less than a new sleeping bag.
Four-Season Tent
These are expensive and not 100% necessary, but having a four-season tent does significantly increase comfort on snow trips. We have the Hilleberg Jannu, and this thing insulates and blocks wind almost as good as our actual house. At 7 pounds, it’s also surprisingly light for a four-season tent. It costs a whopping $975, so this is the very last thing we upgraded in our winter backpacking kit.
Hand-Warmers
They’re just so cozy in the morning. We keep a pair of these hand-warmers in our packs year-round just in case the weather gets colder than expected or we need a little extra warmth. We also stick them in our boots on extra cold mornings when our boots freeze overnight.
Thinking about doing this trip? Have any questions? Comment down below!
More Happy Packers
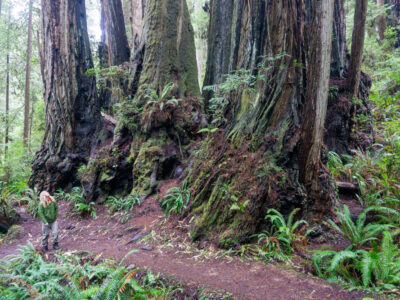
This loop is a tour through the many wonders of Redwood National including the famous big trees, a moody beach, and the mystical Fern Canyon.

We pivoted to this relaxing winter backpacking trip after being shut-down from another nearby trip. We were surprised by a campsite with panoramic views and an easy hike up.
Part 3 of our winter backpacking series is just me throwing a bunch of random cold-weather tips into the universe. I’ve got tips on how to stay warm and dry, how to build a perfect camp, and how to keep your food edible.