01 Nov How To Backpack in the Winter: Planning a Winter Trip
How-To
How To Backpack in the Winter
Part 1: How to Plan a Winter Trip

This how-to series is for anyone who’s ever wanted to go winter backpacking but thinks it’s too complicated, pricey, or just doesn’t want to freeze in the wilderness. In this three-part article series, I’ll show you how to plan a winter trip, dress yourself for the cold, and keep yourself comfortable while you’re out there.
Part 1 (this part) is all about planning a winter trip. What gear do you need? How do you find the best trail? And how do you figure out the conditions before your trip? Continue reading to find out!
Part 2 is all about the clothing, footwear and accessories you need to make your trip comfortable. Part 3 is full of tips on how to stay dry and warm while you’re out there.
Gear
I don’t usually like talking about gear because it puts me to sleep, but unfortunately, gear is really important when you’re camping in the snow. It seems like for every piece of normal gear, there’s a winter-weather equivalent (sometimes called “4-season” gear). There’s 4-season tents, sub-zero sleeping bags, high R-value sleeping pads, and a million other things marketed towards winter camping. When you start tallying the cost of all these new toys, you might end up thinking that snowy camping is only for people with lots of money to burn.
Fortunately, you don’t have to upgrade all your gear at once. You can make strategic purchases here and there to modify your own gear, and then save up for that million-dollar 4-season Hilleberg fortress. You may not be able to make it to the Arctic with a half-upgraded kit, but you will be able to go on a couple mild snowy trips. Here’s the order that we upgraded our kit (excluding snowshoes and clothing because that’s in Part 2):
Egg carton sleeping pad: You might actually already have one of these. I use an egg-carton type sleeping pad year-round because it’s inexpensive and durable. In the winter, the shiny material also does a good job of reflecting body heat back at me. If you’re buying one specifically for winter time, try to get the thickest one you can find. A big part of sleeping comfortably is getting yourself as far away from the snow as possible.
A really good tent tarp: You’ll want a really good, watertight barrier between you and the snow. Four-season tents come with a thick bath-tub style tarp built into the tent, but you can fake it with a quality stand-alone tarp.
Sleeping bag liner: Liners are a great way to add 10 to 15 degrees of warmth to your sleeping bag and they’re way less expensive than upgrading your whole sleeping bag.

Zero-degree sleeping bag: We’re starting to get into the big ticket items. I like our Marmot Neversummers, but I have no authority on sleeping bags. Also, full disclosure, we got these as a Christmas gift from my family.
4-Season Tent: This is the final — and most expensive — upgrade you’ll make to achieve peak winter performance. Dylan’s family bought us the Hilleberg Jannu for Christmas in 2017 and we still praise it every time it saves us from horrible weather.
The main difference between a four-season tent and a regular backpacking tent is that the tent fabric is woven so tightly that warm air stays trapped inside and cold air stays outside (where it belongs!). I think the biggest benefit of the four-season tent is being able to stay semi-comfortable when the weather goes bad. During a winter-y South Colony Lakes trip, we struggled through a high-mountain blizzard inside this tent. A couple months later at a very exposed campsite near Longs Peak, we huddled together through a terrifying hail and lightning storm. Both times, we ended up mostly dry — a big surprise given the dangerous weather conditions.
Get Fitter
With all the additional heavy winter gear, you’ll need the leg muscles to haul it all around. If we just compare the pack weight of our tent, our regular tent is only about 2 lbs., whereas our four-season tent is 7 lbs. That’s a big difference when you’re slogging through three feet of snow and desperately want to set up camp.
To me, the best way to train for backpacking is to backpack all the time. When else would you be carrying such a large backpack for such a long period of time? But even with all the backpacking we do in the summer, we still need to slow it down a lot during the winter.
The goal for winter trips is to start with an 8 mile round trip and then increase the distance from there. Truthfully, we usually never make it over 12 miles. Although one time, we somehow finished a 20-mile trip on an unplowed and very snowy Glacier Point Road in Yosemite National Park.
If you live in a place where you don’t get a lot of practice backpacking or you just want extra credit for preparation, there’s a bunch of exercise programs online (1 & 2) that can help you strengthen all the most important muscles before your trip. I think any program with step-ups, squats, dead lifts, and lunges will do.
Weather
Figuring out snow-pack and weather conditions is easily one of the most frustrating things about winter backpacking — and probably the most important. Bad weather in sooo much worst in the winter than in the summer. There’s three things that can make or break a winter trip: snow pack, temperature, and wind speed. Oh, and maybe don’t backpack when it’s actively snowing — that doesn’t sound very fun.
To gage snow pack, I use a patchwork of resources from calling park rangers to googling “[Park name here] snow pack.” If you’re lucky, you’ll find the greatest treasure: detailed snow charts maintained by government agencies. My favorite interactive snow map is the one maintained by NRCS which is a part of the US Department of Agriculture. It lets you check snow depth at any of their bazillion weather stations across the western United States. Better yet, some parks, like Yosemite, update their current backcountry conditions reports even in the dead of winter.

If you’re unlucky, you may have to rely on park ranger information, or just assume the worst and bring all your snow gear. I would lean towards bringing all your snow gear. We’ve had a couple backpacking trips go badly because we believed the ranger when she said there “probably wasn’t going to be any snow on the trail.” Well, there was a lot of snow — and it was all over the trail — there was so much snow we couldn’t even find the trail.
My guess is that a lot of smaller parks don’t have rangers patrolling in the winter so there’s no way of knowing how much snow is in the ground, especially in the backcountry.
With some patience and extra planning, you can even monitor snowfall in the area a couple weeks out from your trip. If you know it’s been snowing for two weeks straight, you can be 100% certain that you’ll need snowshoes. If you see large temperature fluctuations with hot, sunny days and freezing cold night, you’ll probably see a lot of ice on the trail.
As far as checking temperature and wind speed, a regular old Google search will do. If you can only find temperature readings at much lower elevations than your backpacking trail, subtract about 5 degrees for every 1000 feet in elevation difference.
So the final question is, how do you know when the weather is so bad that you should stay home? After a couple sketchy-weather trips, we’ve come up with a couple weather-related rules for ourselves that will hopefully keep us safe and make our trips a lot more fun:
The average low temperature has to be over 10° Fahrenheit.
The wind speed has to be less than 10 mph.
We don’t backpack if it’s actively snowing.
I’m hoping that if we stick to these rules this year, we won’t run into the debacles of last year.
Choosing a Good Route
Choosing your route can go two different ways: you can either follow park-established snowshoe/ski trails marked by blazes (little plastic signs) on the trees or do the navigation yourself without a trail. Not everyone has an established snowshoe trail nearby, but if it’s an option, I would definitely take it. Even with the blazes on the trees, navigation can be hard when the blazes are spaces far apart. We’ve definitely veered off from established trails and found ourselves at least half a mile off course. If you think backtracking is annoying without snow, wait until you have to backtrack in the snow. This is the stuff that tantrums are made of.
The next question is, how do you find an established snowshoe trail? And the answers are numerous. For example, Sequoia National Park is great at maintaining their snowshoe trails. They have a map that you can purchase at their winter visitor’s center with all the snowshoe trails, their blaze symbol, and where you can camp. The problem is that this map isn’t available to you until you get into the park, so you can’t really plan your trip beforehand.
Some parks allow you to snowshoe on closed road that don’t get plowed during the winter. Sometimes the snow is so packed that you don’t even need snowshoes. Yosemite National Park opens up the last 10 miles of Glacier Point Road to backpackers and skiers — which is great because backpackers can camp in front of the jaw-dropping views at Glacier Point. In the mega-popular Indian Peaks Wilderness in Colorado, the park closes the last 3.2 miles to the always-packed Brainard Lake summer trail head, and opens up the unplowed road to snowshoers and skiers.
One of the biggest things that separates a good snowy backpacking trip from a horrendous one is reasonable mileage. I’m guessing most people who decide to venture into winter backpacking already have a lot of experience backpacking without the snow. You may be used to covering 10 to 20 miles a day. Well, you won’t be doing that on the snow. There’s no physical way to do it. Not only is your pack a lot heavier, but you’re also probably wearing a winter coat, big boots and snowshoes.
For our first winter trip of the season, we try to keep the mileage under 8 miles round trip. I know this sounds tiny, but even covering 4 miles a day can absolutely drain you in the winter. We also keep the elevation gain as low as possible so that we can get used to walking in snowshoes and remember how to navigate icy patches on the trail.
Lastly, we try to pick a very, very epic destination for our winter trips to give us something big to look forward to. Winter backpacking can be extremely hard, so rewarding yourself with an incredible view is a great way to soften whatever pain you’ve inflicted on yourself and your hiking buddy. When I first saw the perfect untouched snow and sheer-cliff views of our campsite at Pear Lake, I completely forgot about the scary 45 degree field of snow we had to cross to get there.

You can also save those beautiful but super popular trails (with impossible-to-get permits!), for winter time because even the most popular trails become nearly empty when there’s snow on the ground. During our Panther Gap trip, we saw only one lone Norwegian day hiker in the Giant Sequoia grove and he paused with us to marvel at the trees and how no one else was here to see this. On a beautiful summer day, this trail is absolutely packed with hikers.
Bringing the Right Food
And now for the easy part: take all the fattiest, most calorie-rich foods you can find and bring them on your trip. Backpacking in the winter takes about 50% more energy than backpacking in the summer, so you can take this opportunity to eat everything in reach. Additionally, you’ll need to pick foods with a low freezing point, which also translates to foods with a high fat content.
We like to pack peanut butter, honey-buns (the food with the lowest known freezing point), candy bars with peanut butter in them and those super-dense Safeway brownies. For dinner, we go with something warm and carb-y like ramen. We always err on the side of bringing way too much food — way more than usual — because the hike in is always draining.
One lesson that I kept learning the hard way was not to bring any candy bars with caramel in them. The caramel freezes instantly and creates a crunchy mine field for your teeth. Plus, you can’t even thaw the candy bar by putting it in a pocket near your body, because the chocolate melts first!
More Happy Packers
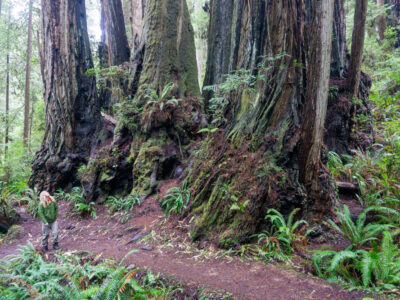
This loop is a tour through the many wonders of Redwood National including the famous big trees, a moody beach, and the mystical Fern Canyon.

This is the perfect any-season beginner trip for anyone wanting to dip their toes in backpacking.
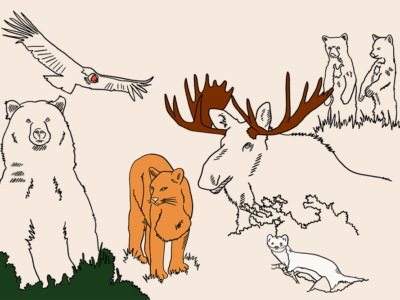
Animals in the wilderness can be scary, but they don’t have to be. Here’s how to feel perfectly at home with the bears and mountain lions.