01 Dec Teton Crest Trail, Grand Tetons National Park


guides // backpacking // wyoming
Teton Crest Trail, Grand Tetons National Park, Wyoming
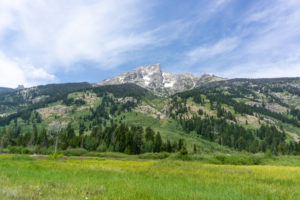
The Tetons look like a real-life version of the mountains you used to draw as a kid. They’re almost perfect triangles and rise straight out of a sweeping, perfectly-flat valley. Not to mention these mountains are FULL of wildlife – bears, moose, beavers, and all other kinds of smaller creatures.
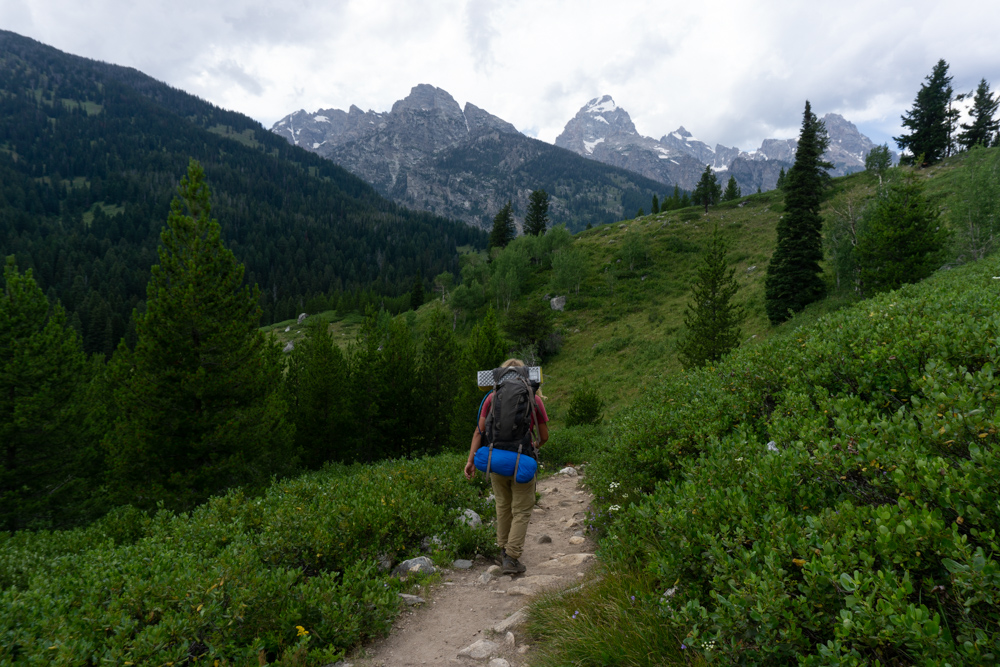
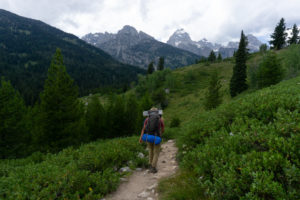
The Teton Crest Trail hugs the back side of the Tetons, which means you’ll get amazing mountain views as the trail takes you through beautiful canyons, forests and valleys. The camping along the trail is also some of the most epic camping we’ve ever found. We had spectacular views of the Tetons both nights. The campsite on the second night is actually Dylan’s favorite place we’ve ever camped.
Quick Notes
Pictures taken July 2018
Total Distance: 40.4 miles
Elevation Gain: 6,210 feet
Difficulty: Hard
Days: 2 – 4 Nights
Hike Type: Thru-Hike or Loop
Trailhead: Varies
Seasons: Summer & Fall
Permit Requirement: Yes, Year-Round
Camping: Designated and Dispersed Camping
Map: National Geographic Grand Teton National Park Map #202
Park Brochure: Backcountry Trip Planner
Water: Filter along the way


When to Go
Firstly, the roads to most of the Teton Crest trailheads are closed in the winter from November to May. You might be able to access the Granite Canyon trailhead from Teton Village (the ski resort) but otherwise, the whole place is snowed in. For me, the road situation pretty much crosses out winter as a potential option. Not to mention how terrifying some of those extremely steep passes would be if they were covered in snow and ice.
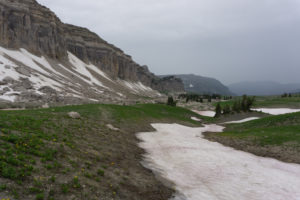
In low-lying sections of the trail, the snow is usually melted and gone by mid-June; however, at higher elevations, snow can stick around well into summer. You may even need an ice ax and crampons (and knowledge of how to use them), for some of the taller passes and divides. When you pick up your permit, the park rangers will go over which passes still have ice on them and whether you’ll need ice gear. If there’s still snow on your route and you don’t want to deal with it, you can always change your backcountry permit to a less high-maintenance route while you’re picking up the permit.
We took our trip in late July and didn’t have any real problems with snow or ice on the trail. The only area where snow was an issue was on the east side of Hurricane Pass, where some sections of the trail were still covered by an icy layer of snow. The descent from the pass is pretty steep so we didn’t want to walk directly on the slippery snow. Luckily, we were able to improvise a route through the dry areas by connecting some of the larger dry patches. All in all, it wasn’t too treacherous, although I did get nervous a couple times.
In terms of crowds, the Tetons are always going to have a ton of fans. We took our trip on a busy mid-summer weekend in late July and the backcountry crowds were surprisingly not too bad. Because of the strict permit and quota system, we only saw about six groups our entire trip. The only time it got frustratingly busy was in Cascade Canyon as we were descending back to the valley— I’ve never seen that many day hikers so far into the backcountry.
The weather was also pretty much perfect. It rained almost the entire second day, but it was so mild that we didn’t mind. It was also nice to see the mountains in all kinds of weather. The rain even cleared up as soon as we got to camp so we didn’t have to set up our tent in the rain.
Checking Current Conditions
You’re in luck with this one! The rangers keep a detailed blog of current backcountry conditions at the Jenny Lake Climbing Rangers BlogSpot. Other than that, you can consult the NOAA page for their Grand Tetons stations (specifically, the Jackson airport station).

Trip Cost
Park Entrance Fee*
Reserved Wilderness Permit
First-come-first-serve Permit
$35
$45 per permit
$35 per permit
*If you know that you’re going to be going to a national park more than three times in a year, it’s worth it to buy a National Parks Pass. They’re $80 and sold online, at all REI locations, and National Park Visitor Centers.

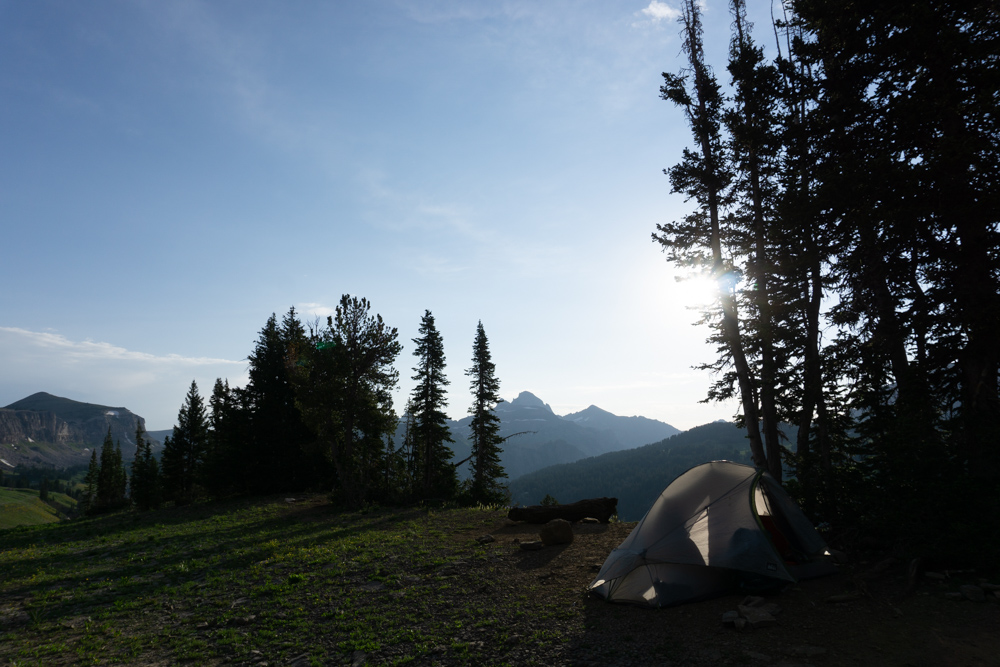
Distant Teton views at night 1 campsite (Death Canyon Shelf camping zone).

Hardcore view of The Grand Teton at our night 2 campsite (South Fork Cascade camping zone).
.

Before You Go
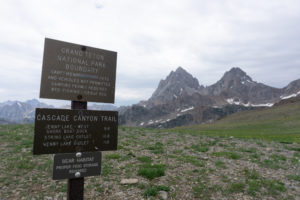
First, you’ll have to decide which route you want to take. With how the trails are built in the Tetons, there’s at least 15 loops that take you into the mountains and back out. This is super convenient because the flexibility of the routes makes getting a permit a bit less difficult (even though it’s still pretty tough). Additionally, if you want to avoid icy conditions at the top of passes, you can plan your trip to avoid the taller passes like Paintbrush Divide and Buck Mountain.
You can think of the trail system in the southern Teton area of the park as a grid. There are two trails going north-to-south: the low-elevation Valley Trail on the eastern side and the high-elevation Teton Crest Trail on the western side. Six different “canyon” trails run east-to-west connecting the Valley Trail with the Teton Crest Trail. The Grand Teton and its neighboring Teton friends sit a little north of the grid center.
The largest possible loop you can make would start at Granite Canyon and extend all the way to Paintbrush Canyon. The whole trip is 60 miles and would probably take 6 to 7 days because there’s so much elevation gain. The smallest loop is Cascade to Paintbrush Canyon, which is 20 miles and would take 2 to 3 days. When planning your route, the park recommends assuming you’ll hike 2 miles per hour and that you’ll only be able to get over one mountain pass per day.
After you pick your route, the next step is to make your backcountry permit reservation. The park requires all overnight visitors to carry backcountry permits. You can either make a reservation online or pick up a first-come-first-serve permit at the Craig Thomas Discovery and Visitors Center in Moose and the Jenny Lake Visitor Center. The park accepts reservations from January 8th to May 15th, and it’s extremely important to make your reservation on the 8th if you want an advanced permit. These permits go very very fast. Either way, you’ll have to stop at one of the visitors centers before your trip to pick up a paper copy of your permit.
One big thing to think about when picking a route is that permits for Paintbrush Canyon seem to be the hardest to get. For our trip, we were too late to get reservations so we did first-come-first serve permits the day before our trip. We originally wanted to camp in Paintbrush Canyon, but all the permits had been taken by people who were going on longer loops through the mountains. After some deliberating with the park ranger, we ended up with the Death Canyon-Cascade Canyon Loop.
The frustrating thing about the first-come-first-serve process in the Tetons is that you can get your permit one day in advance of your first hiking day. This means that if you get to the Tetons on Friday and stand in line for your permit that morning, your first backpacking day is going to be Saturday (unless you get really lucky and they still have Friday spots). This meant that we had a whole day to burn before our trip and that we’d have to find last minute car camping for the first night.
We ended up strolling Jackson all day and snagging one of the last campsites at the Gros Ventre Campsite. If all the car camping near the Tetons is gone, there’s plenty of free dispersed camping in the area.
Anyways, by this point in the trip, I really hope you got your permit and are heading to the Tetons!

Getting There
We started our trip from the Death Canyon trailhead so that’s what I’m describing here. It looks like a lot of the other trailheads are pretty easy to get to as long as you get to the parking lot early enough to get a parking spot. Specifically, the parking lots near Jenny Lake look like they fill up pretty early.
From the town of Jackson, head north on Highway 191 towards the Tetons. The mountains dominate the view here so you’ll know if you’re heading in the right direction. Continue north until you see signs for Moose, and turn left onto Teton Park Road into the tiny village. In Moose, you’ll find the Craig Thomas Discovery and Visitors Center, an outdoor restaurant with a view, and a convenience store and gift shop. The visitor’s center in Moose is humongous and has a large gift shop as well.
Further west on Teton Park Road, you’ll see the turn for Moose Wilson Road. Take a left at the intersection and head down Moose Wilson Road for about 5 miles. Next you’ll see the turn for a dirt road called Whitegrass Ranch Road. The trailhead is at the end of this road. At the trailhead there’s a deathly-stinky pit toilet and a couple parking spots. Most people just parked in turnouts along the road.
We noticed that the road gets rougher the closer you get to the trailhead, so some people with smaller two-wheel drive cars parked on road turnouts farther away from the trailhead. The parking is fairly unregulated on this road, so I think all the parking along the road is legal. Although I would double-check with a ranger while you’re picking up your permit.
Once you find some parking, you’re ready to hike! Make sure you take your permit with you.
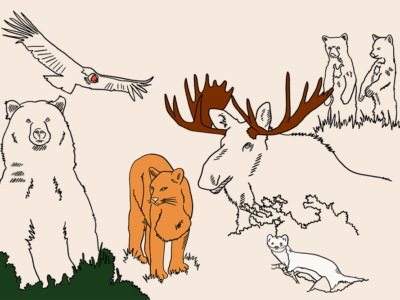
Special Animal Notes
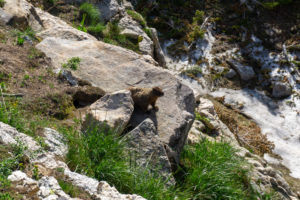
A lot of big-deal animals live here. You might see grizzly bears, black bears, moose, beavers, weasels, marmots, and all the other types of smaller animals. We didn’t see a grizzly, but we did see three moose, a giant beaver, and a bunch of marmots. Needless to say the moose were by far the most terrifying. Two of the moose we saw were way to close for comfort.
To keep you safe from the bears, the park has a couple recommendations on their Backpacking Trip Planner. Here’s a cliff-notes version:
- Carry bear spray in an easily accessible location and know how to use it.
- Store all your food and other smelly items in a park-approved bear canister. If you don’t have one, you can borrow one from the park for free at the office where you pick up your permit. We use the BearVault BV450 Food Container for our bear-safety storage needs.
- Make noise while you hike (like clapping, talking loudly, or singing) so that you don’t surprise a bear and make it feel threatened. We tend to loudly retell stories from books we’ve read.
- If you do happen upon a bear, back away slowly and don’t make eye contact. Don’t run! A bear is always going to win a race against a human. Don’t climb a tree either — they’re still way more skilled than you.
- If the bear charges you, stand your ground and draw your bear spray. Bears like to false charge when they feel like they need to defend their cubs or food. If bear spray fails you and it’s not a false charge, drop to the ground, belly-down, and protect your neck with your hands. Don’t take your backpack off, it acts like a turtle shell of protection. I really hope no one reading this gets attacked by a bear.
- Cook and store your bear canister at least 100 feet downwind from your campsite.
- Wear different clothing for cooking and sleeping. Since we never have enough room to store cooking clothing in our bear canister, we usually shove our smelly clothing deep into our backpacks.
- The park says to keep your backpacks outside of your tent but I’m always worried about marmots and squirrels chewing up our stuff so we keep our backpacks in the tent (like they recommend in Yosemite).
Dylan had been reading up on grizzly bear attacks and was extra worried about an attack, so he came up with some added protection for us in the tent. He was particularly freaked out by the attacks where the bears drag people out of their tents at night. To give us a little more protection around our heads, we half-inflated Dylan’s sleeping pad and wrapped it around the inside of our tent at the head area. I’m not sure how much this would have helped if a bear really came along, but it gave us a little more security.
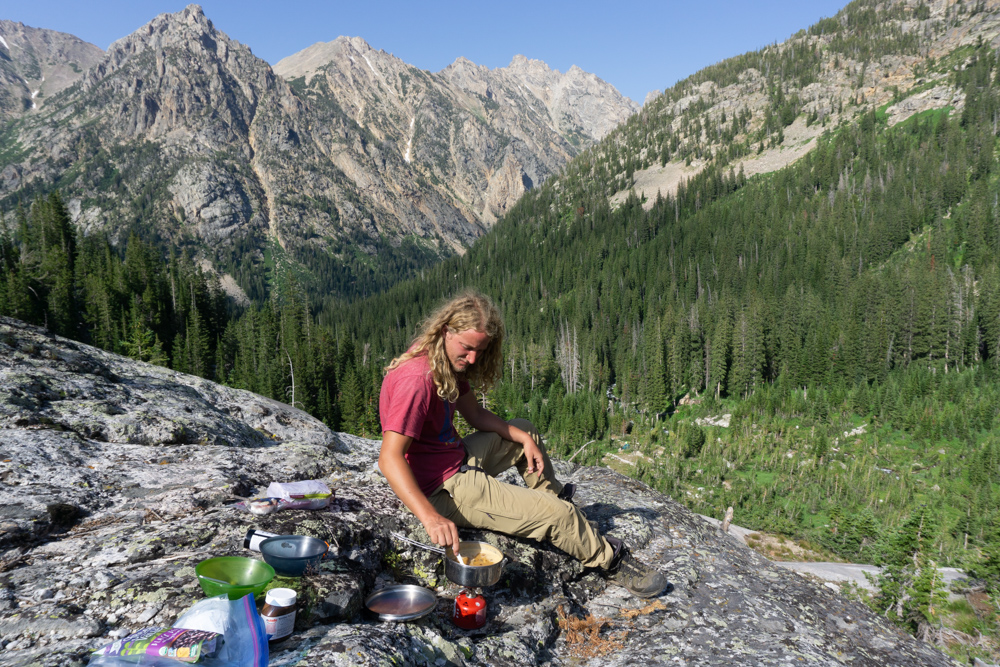
Probably the most scenic place we’ve ever cooked dinner (South Fork Cascade camping zone).
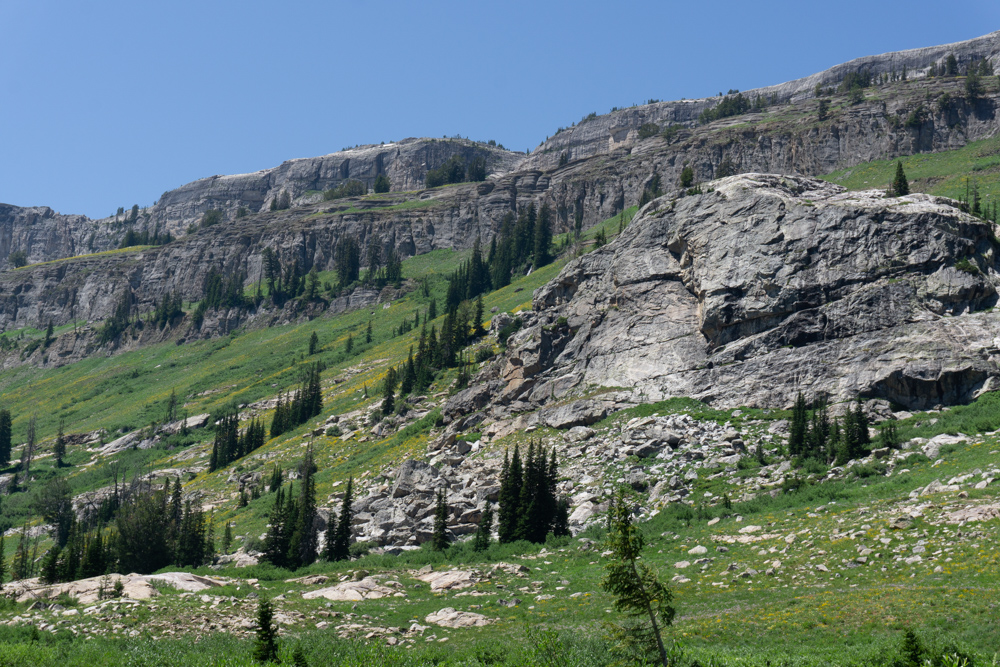
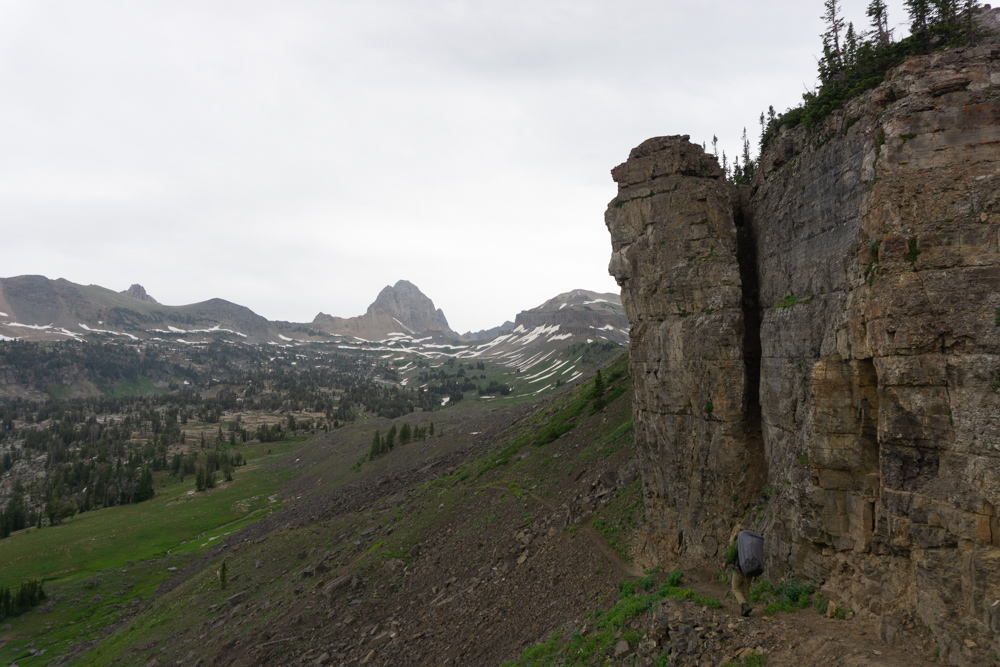
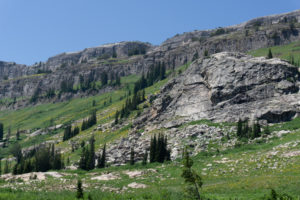
Cliffs above Death Canyon.

On the Trail
We took the Death Canyon-Cascade Canyon Loop so that’s what I’ll be describing here.
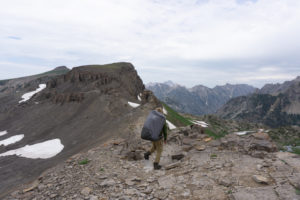
The trail starts out in a lush, humid forest and stays there for about 4 miles. Occasionally, the trees break and you get beautiful views of Phelps Lake. You can also hike down to the lake if you don’t mind adding about 1 mile to your trip. After the lake views, the trail gets intense. You’ll have to take switchback after switchback until the trail flattens out at the beginning of Death Canyon.
Death Canyon is awesome and you can actually see how awesome it is because the trail stays mostly out of the trees. This part of the trail is also less steep than the switchback area so it’s probably going to be the most relaxing part of the day.
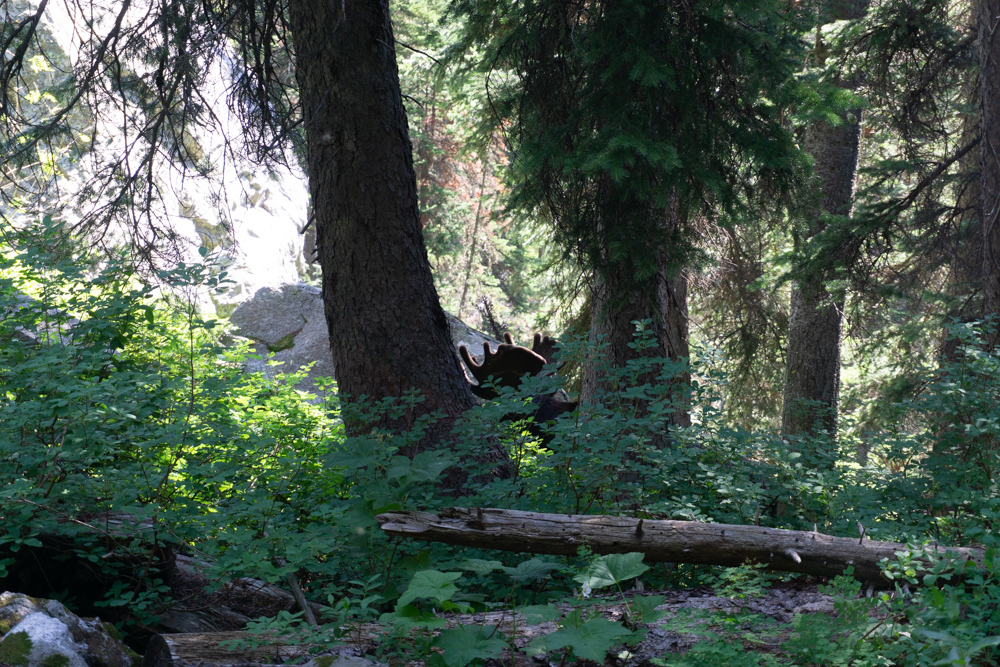
I did get an adrenaline rush when we saw an absolute monster of a moose sipping on some water at the beginning of the canyon. He was only about 15 feet away from us! We slowly skirted him as he made angry faces at us and hiked into the canyon with that special paranoia that follows any scary animal encounter. We were convinced that every single sound was a giant animal coming to slay us.
Death Canyon is the first camping zone along this route. You’ll see metal signs along the trail showing where the camping zone starts and ends. If you want a campsite with a view, you should plan on camping near the end of the camping zone, because the first half is in the thick forest.
We didn’t camp here but it looked like there were a couple spots that would have amazing views. In some camping zones, including this one, park rangers put metal markers on the ground to hint at where good camping spots may be located. All you have to do is follow the side trails to the perfect camping spot. Plus, if you camp in an existing campsite instead of flattening out a new one, you’ll be reducing your impact on the park.
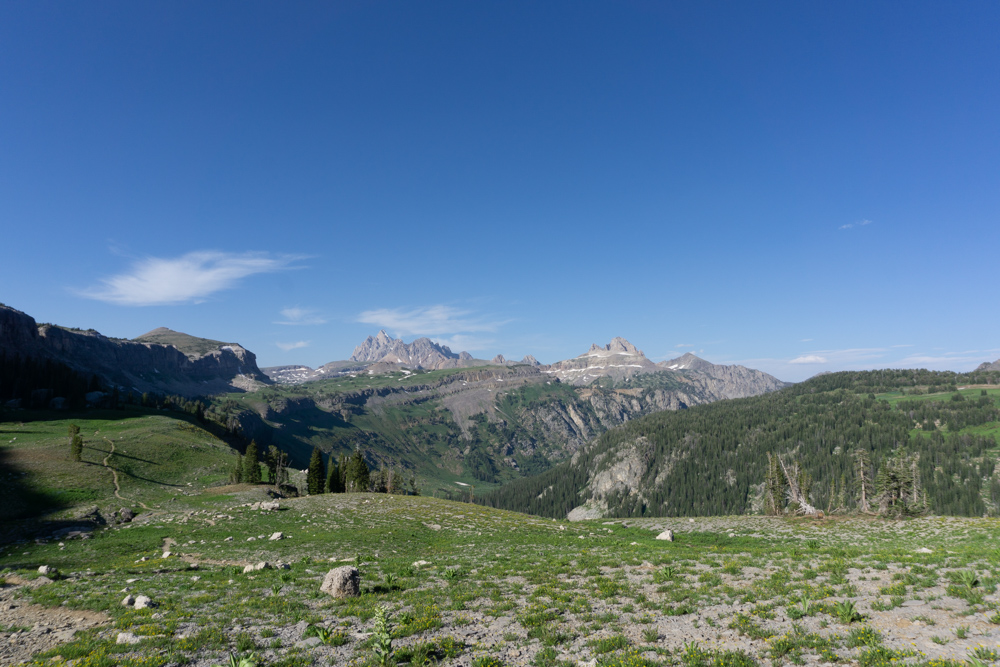
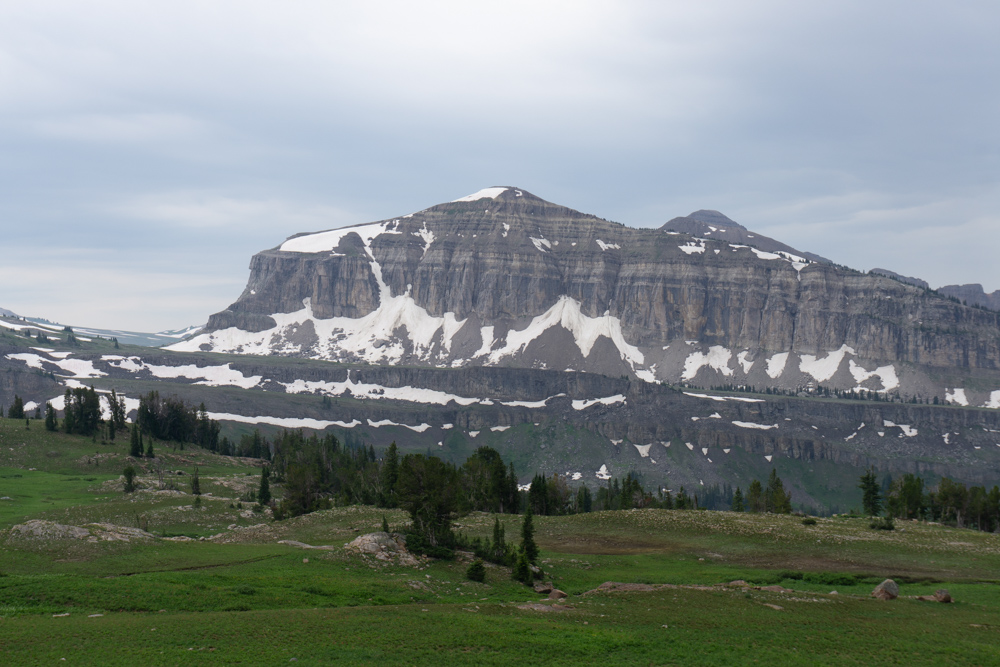
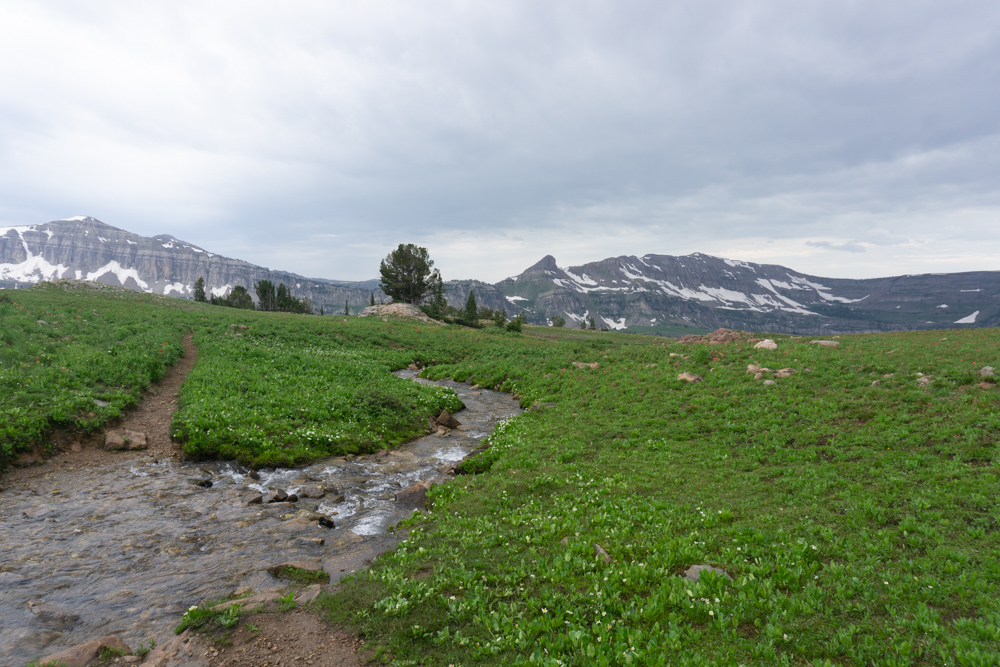
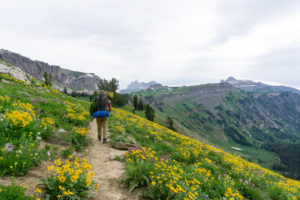
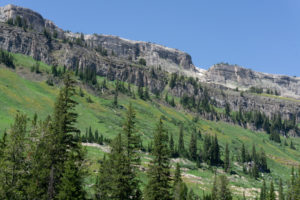
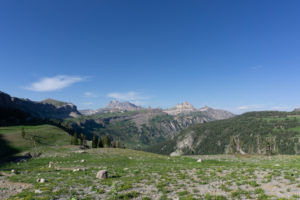
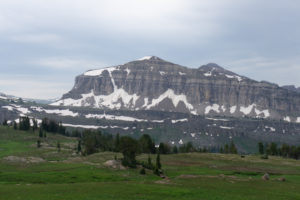
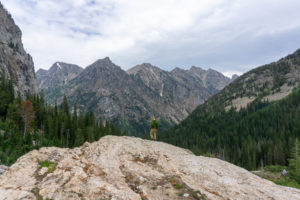
Four miles into Death Canyon, the trail veers north and slowly switchbacks all the way to the top of the canyon. In the summertime, this switchback-y area is full of blooming flowers. The hike up to the top is super hard but you’ll be greatly rewarded with distant views of the Grand Teton, 10 miles away. Seeing faraway landmarks like this always puts things into perspective for me — although I’ve never fully wrapped my head around some of the larger distances we’ve hiked.
When you get to the top of Death Canyon Shelf (aptly named, it does look like a giant shelf), there will be a junction. Head right towards the Grand Teton. The beginning of the next camping zone is in about half a mile. This zone doesn’t have any ranger-made campsite markers, so we started looking for a sheltered spot with a view. We also got some good advice from a hiker coming from the other direction. He said that it’s hard to find a flat camping spot after the large group site (which is about half way through the camping zone), so we should try to find a spot near the beginning.
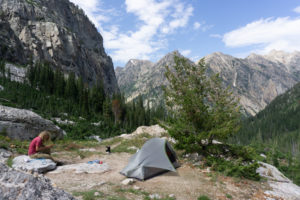
We hiked about half a mile into the camping zone before spotting exactly what we were looking for: a flat spot, with some tree cover and a view of the Tetons. There was also a conveniently located creek nearby where we could fill up on water. We set up our tent and relaxed a bit. Then, we walked about 300 feet away from our tent to a group of boulders to cook dinner.

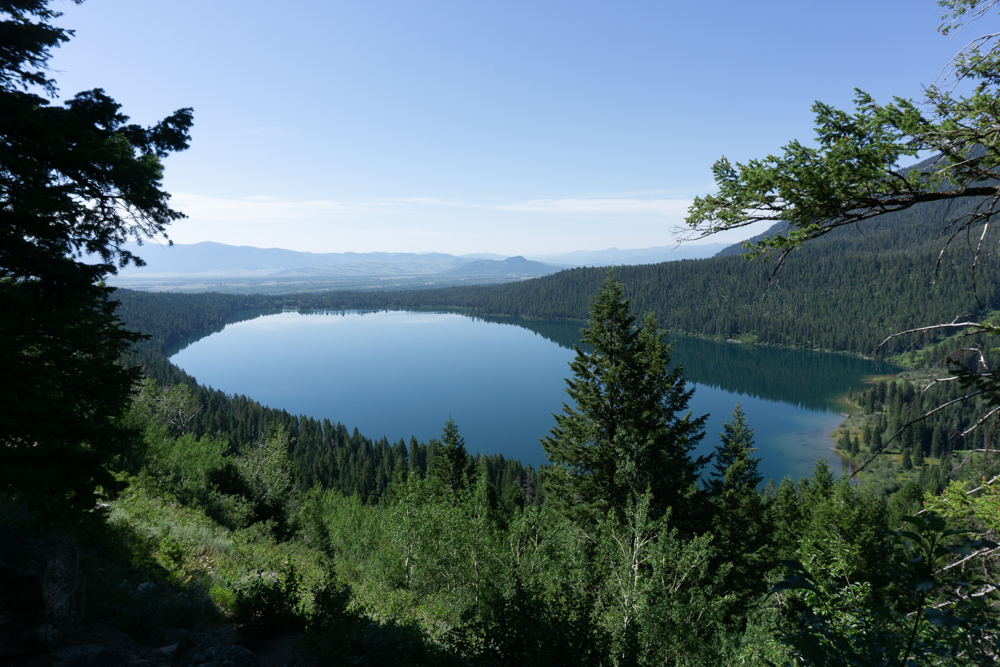
View of Jenny Lake through the trees.

Not forgetting this campsite for a long time (South Fork Cascade camping zone).
The next day we woke up to some furious-looking storm clouds in the distance. We quickly cooked breakfast and took off. The next 2 miles of the hike were some of my favorite because the trail was slightly downhill and we got to look at the Tetons the entire time. The flowers in this area were also blooming like crazy.
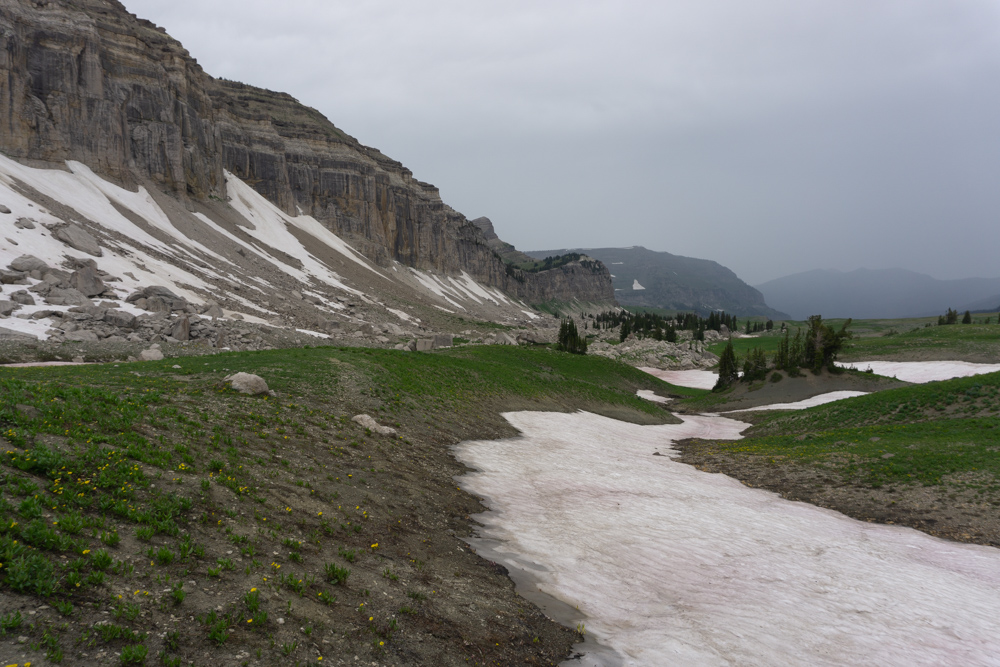
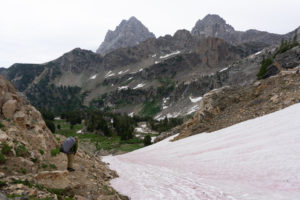
It started raining about mid-morning so we suited up and slowed our pace a bit. Luckily, it didn’t pour too hard but we did see some people along the way that chose to stay in their tent and wait out the storm. We also had to cross a couple large snowfields, which was a bit of a surprise in late July. For reference, we didn’t have crampons, microspikes or an ice axe, and we did fine.
As we descended into a beautiful green valley, we started seeing more people camping and hiking along the trail. My guess is that, more people camp in this area because this valley isn’t within National Park land (it’s in National Forest land) and doesn’t have a backcountry quota limit. It looked like a lot of people set up their tents in the valley and took day trips around the area. You can even climb to the top of the Grand Teton and its smaller mountain friends from here.
After arriving at the lowest part of the valley, the trail instantly switches back to uphill mode. You’ll be going uphill for what feels like forever. There’s sharp switchbacks, gradual hills, and everything in between, until you finally arrive at the entrance to the national park again and an extremely imposing view of the Tetons.
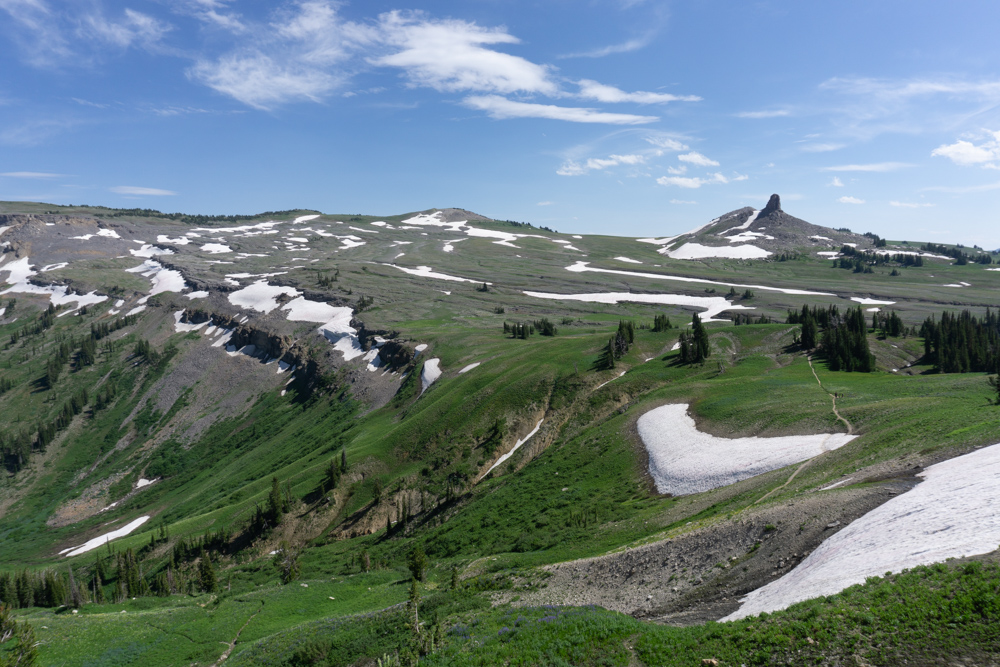
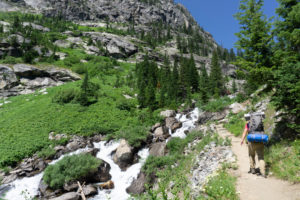
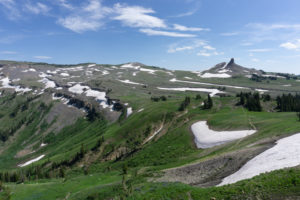
Soon after the Tetons view, you’ll get to the highest point on the trail at Hurricane Pass. The pass is very steep and only about a couple feet wide, but luckily conditions were good and we didn’t fall off. I can see how it would be treacherous if there was ice on the pass or any kind of stronger wind. The decent was steep but somewhat straightforward. Some parts of the trail were covered in snow so we had to re-route and find different ways down. The snow covered areas looked way too steep to attempt a crossing without proper gear.
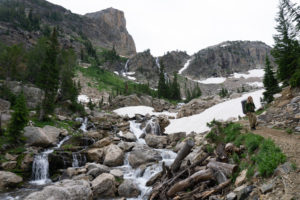
After the initial steep parts of the decent, the rest of the hike that day was a pleasant downhill stroll. We walked past beautiful waterfalls and distant mountain views. The South Fork Cascade Camping Zone starts about 1.5 miles from the top of the pass. The beginning of the zone has a couple cozy in-the-trees type camping spots; the middle of the zone was absolutely wrecked by an avalanche in 2016 (so no camping here); and the end of the zone has some sparse but epic campsites with giant views of the surrounding mountains.
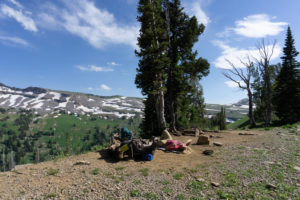
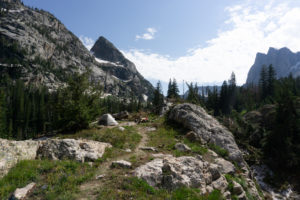
We blew past the first half of the camping zone because we wanted to camp farther that day to decrease the mileage for the next day. As the avalanche damage cleared up, we found a tiny side trail to an outcrop that overlooked the river. I figured there’d be a really good campsite on the outcrop and went on a quick scouting mission. I had to do some searching, but I ended up finding what would become Dylan’s favorite camping spot ever. We were camped face-to-face with the backside of the Grand Teton and it was awesome.
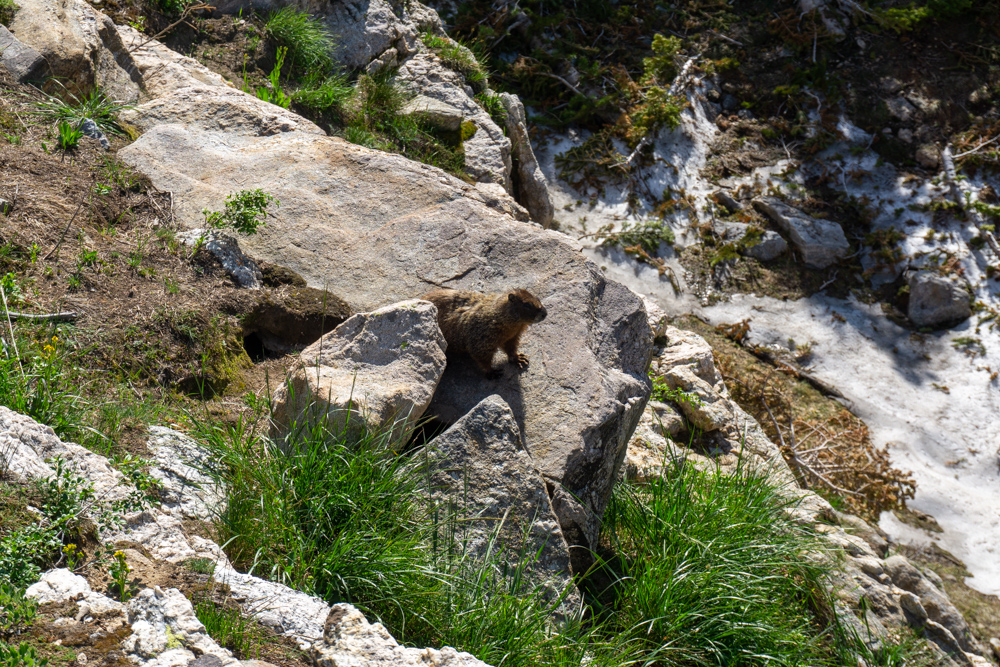
We set up camp close to the ledge (as always) and explored the area. One drawback of this spot is that if you want to get water or cook far away from your tent (like you’re supposed to) you have to negotiate some pretty steep and rocky terrain. Dylan only went down to the river once for water because it took a lot of time and effort to navigate the boulders. On the bright side, because we were camped among so many boulders, I got to do one of my favorite backcountry activities: stalking marmots as they dive in and out of their homes.
Marmot scurrying back home.
Last bit of hiking on the Valley Trail.
The next day we woke up and started down Cascade Canyon. Eventually, we got to the junction between Cascade Canyon and Paintbrush Divide, and headed down Cascade Canyon. Initially, it was a very normal downhill hike below the tree line. We were probably drifting off and daydreaming a bit when we saw a hiker about 30 feet up the trail yelling and motioning us to stop. We quickly looked around and saw another monstrous and angry-looking bull moose about 20 feet from us in the trees.
Stifling a bit of panic, we crept up the opposite side of the trail and made ourselves as invisible as possible. The moose crossed the trail and walked right by us with the meanest look on his humongous face. When he was far enough away to where we felt good moving around, we scurried back down to the trail and met up with the hiker. The hiker has been dealing with this moose’s wrath for a lot longer than we had — the moose had false-charged him on the trail a couple minutes before we got there.
After that hit of adrenaline, the peacefulness of an empty downhill trail through the trees was very welcome. After about a mile from the junction with Paintbrush Divide, we started noticing that the number of day-hikers on the trail was exponentially increasing. It was like a parade coming straight at us and we were lost in the crowd trying to go upstream.
I’ve never seen so many people on a trail this far into the backcountry. It was shocking seeing that many people after spending a couple days in the woods. As we got closer to Jenny Lake, the crowds got bigger and bigger until we ended up in a giant parking lot/road. We crossed the giant parking lot and connected back up with the trail at some unnamed trailhead. I still have no idea where we ended up that day.
As we headed down the trail to Bradley Lake, the crowds thinned out and the shrubs next to the trail got taller and a lot denser. It looked like no one had walked on the trail in a lot time. Then, we started hearing hurumphing noises that sounded a lot like the moose friends we saw earlier. We couldn’t really see too far into the shrubbery, but we were pretty sure we were about to have another moose encounter. Instead of risking another moose emergency, we decided to back track and do some road hiking to the Lupine Meadows Trailhead that would also take us to our day-3 Bradley Lake Campsite.
The rest of the trail to the campsite was fairly uneventful. The trail winds to and from several beautiful lakes with giant views of the Tetons. We even saw a couple people swimming in the freezing-cold water. One bizarre thing about this area is that even though it’s so close to a bunch of trailheads, it doesn’t look like a lot of people had walked the trail. The forest was also super thick in some areas so we were pretty convinced we were going to have another moose surprise.
When we got to our lakeside campsite, we were exhausted and ready to sit around for a while. There are two designated campsites at Bradley Lake and they’re clustered right next to each other. They also have easy lake access for filtering water and going for a swim. We sat around and rested for a while, but it was still early in the day and we were getting restless to just finish out the hike and explore a different part of the Tetons.
After some chronic indecision, we decided to keep going. I’m happy we decided to finish the hike, but I still feel kind of guilty that we had a permit for the spot and didn’t use it. I wish the spot could’ve gone to another group that actually needed it to finish their loop.
We only had to hike 4 miles to the car — the distance was juuust within reach, but it definitely wasn’t easy. The forest in this area is really thick and everything looks like a grizzly bear. Dylan was on such a high level of alert that I don’t think he said anything for 4 straight miles.
About 2 hours after we left our cozy lakeside campsite, we hobbled up to the car, exhausted and happy.

After the Hike
One of my favorite parts of our Tetons trip was going into Jackson for tasty food, really good beer, and kitsch-western souvenir shopping (I bought the leather belt of my Texas-raised dreams). The Jackson Yelp scene is substantial, so it’s really easy to find good restaurants. My favorite food places were Thai Plate, Hand Fire Pizza, and Pearl Street Bagels. I was also almost convinced that we’d see Jimmy Chin casually strolling about (he lives somewhere here), but sadly, we didn’t.
Supply List
The Usual List
Backpack
Tent
Sleeping Bag
Sleeping Pad
Sleeping Bag Liner
Camp Stove
Lighter or Matches
Cooking Pot
Food
Water Vessel
Water Filter
Headlamp
Clothing
Trip Specific Things
Bear Canister
The park requires you carry one. It keeps bears and other forest friends from getting into your food and other smelly things. We use the BearVault BV450 Food Container and we love it. It’s durable, light and fits all of our food for two to three day trips. If you don’t own a bear canister, you can rent one for free at any of the visitors centers.
Rain Jacket
You’ll be perfectly prepared for any crazy mountain thunderstorms.
Thinking about doing this trip? Have any questions? Comment down below!
More Happy Packers
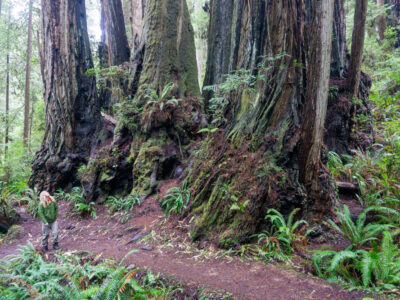
This loop is a tour through the many wonders of Redwood National including the famous big trees, a moody beach, and the mystical Fern Canyon.

This is the perfect any-season beginner trip for anyone wanting to dip their toes in backpacking.
Animals in the wilderness can be scary, but they don’t have to be. Here’s how to feel perfectly at home with the bears and mountain lions.