08 Apr Lost Coast Trail, King Range Conservation Area


guides // backpacking // northern california
Lost Coast, King Range Conservation Area, California
This trip is exactly what the California coast is all about – black sand beaches, coastal plains, and waterfalls that flow directly into the ocean. The Lost Coast is a stretch of coastline in Northern California that is so rough that engineers couldn’t build Highway 1 right up to the coast like they did everywhere else. The place is extremely remote and hard to get to, but once you’re there, it may be one of the most unique places to backpack.
The entire Lost Coast trail is 25 miles long and meanders southbound from Mattole Beach to Black Sands Beach. You can either thru-hike the whole thing or section hike parts of it. Along the way you’ll be able to camp right on the beach or on steep cliffs towering above the ocean. We loved this trip so much that we brought some friends with us for a second round of hiking.
Quick Notes
Photos taken June 2017 and May 2018
Total Distance: 25 miles
Elevation Gain: Varies
Days: 2 – 4 Nights
Difficulty: Medium
Hike Type: Thru-Hike or Out-and-Back
Trailhead: Black Sands Beach/Mattole Beach + A Bunch of Other Ones
Seasons: All
Permit Requirement: Yes, Year-Round
Camping: Dispersed Camping
Map: California’s Lost Coast, Wilderness Press
Water: Filter from streams
Land Steward: Bureau of Land Management

When to Go
Weather on the Lost Coast can be a bit confusing. A lot of the pictures online show the weather as gloomy and heavily overcast, but we got sunny days both times we went – maybe we just got really lucky. The first time we went was in June and the second time was in May, so your chances of getting sun must be much higher in the summer.
One thing that is very predictable about the Lost Coast is that the temperature will always hover between the high 40s and low 50s (Fahrenheit). This means that it’s a great winter-time trip if you don’t feel like messing with the snow in the mountains. The coast does get significantly more rain during the winter though, so make sure to plan for that when you’re packing.
The easiest and most accurate way to check current conditions here is with your regular, everyday weather app or website.
Trip Cost
Wilderness Permit Fee
Wilderness Permit Reservation
Shuttle Service (Optional)
Free
$10 per reservation
$85 per person, minimum 4 people to reserve shuttle
Before You Go
First, you have to decide whether to thru-hike or section hike. Thru-hiking means that you’ll hike straight from Mattole Beach to Black Sands Beach – no backtracking or looping around. Thru-hikers usually start at Mattole and head north to south because that’s the direction the wind usually blows. With a thru-hike you’ll be able to see the entire coast, but you’ll also have to arrange transportation between the trailheads. It takes about 3 hours to drive between the trailheads and the roads are super wind-y. You can either reserve a shuttle to take you from Black Sands Beach to Mattole or make the trip with two cars, parking one of them at Shelter Cove, the other at Mattole and shuttling your friends between the two of them.
If you decide to drive, make sure you have enough gas in your car because there’s no cell service and gas stations are hard to come by. We ended up almost running out of gas and having to ask someone for directions. When we finally did find the gas station, it was one of those old fashioned stations where an attendant pups gas directly from a tank.
If you don’t want to use two cars to go between the trailheads, you can reserve a very convenient shuttle service – but it’ll cost you. Lost Coast Shuttles is the only shuttle service that is currently running in the Lost Coast. It costs $60 per person with a minimum of four people in the shuttle. If you don’t have four people in your party, you still have to pay the ticket price for four people.
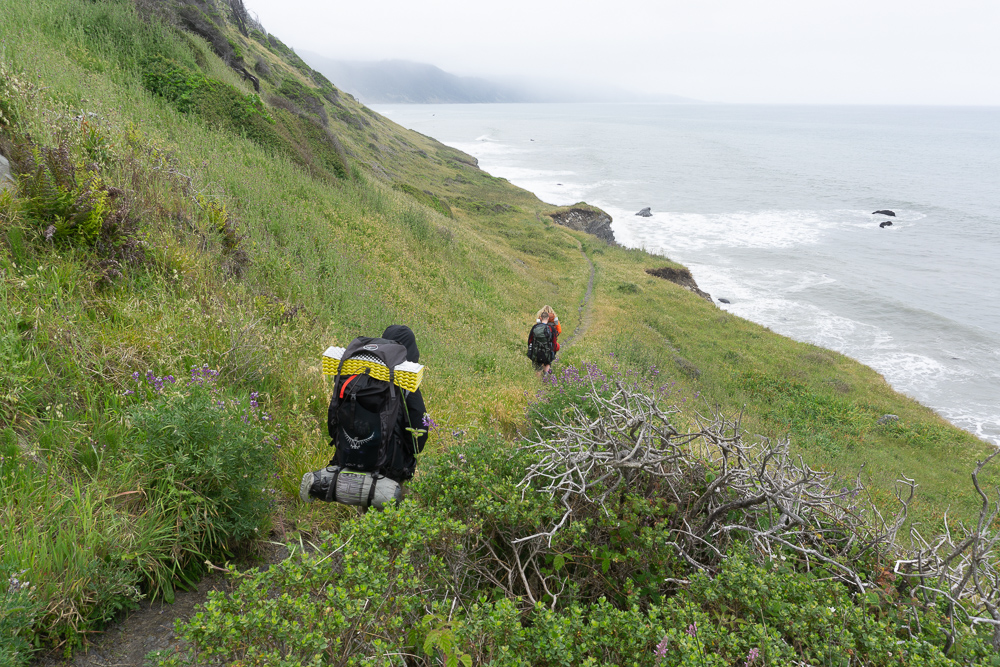
We decided to side-step all of the shuttle and car nonsense and just section-hiked part of the trail. On our first trip, we tackled the middle part of the trail and started our hike from the Kinsey Ridge trailhead. This trailhead is super hard to get to and the road is practically un-drivable (more on that later). In fact, if you pick any of the trailheads that start midway through the Lost Coast Trail, you’ll have to drive through the same intense mountains that kept Highway 1 out of here in the first place. On the bright side, starting your hike in the mountains makes for a great adventure, because you get to see how the forest transitions to beach.
On our second trip, we went with friends and didn’t want to mess around with that un-drivable road again. We started our hike from Black Sands Beach, headed north until Big Flat, and then headed back down to the parking lot.
After figuring out your hike-type and trailhead, the next step is to buy a backpacking permit. Permits are required for all overnight travel on the Lost Coast Trail. To buy a permit, go to the King Range State Park Recreation.gov page and pick your trip dates. Weekends will always be the busiest, but luckily this trail doesn’t fill up as fast as most popular National Park trails. There are 30 permits available per day, and you can grab one up to 6 weeks in advance. Oh, and reservations cost $10 a piece for a whole group.
Make sure you print out your permit or save it on your phone before you head out. You don’t have to pick up a paper copy at a Ranger Station.
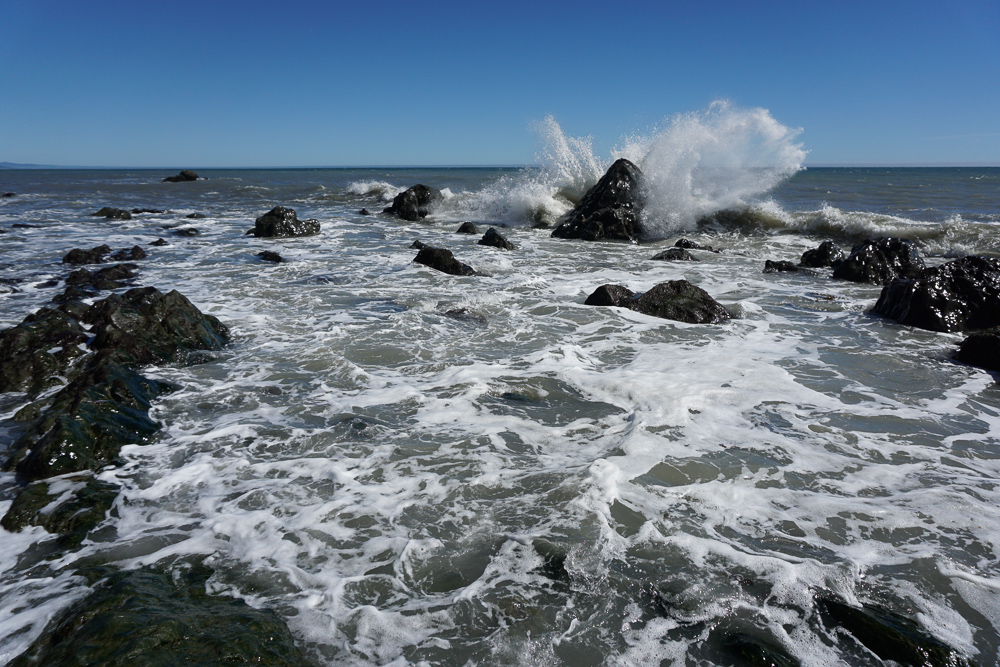
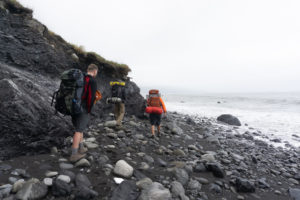
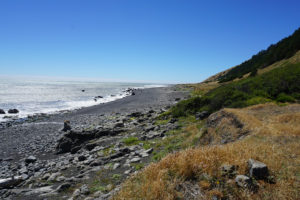
This section would be entirely impassable at high tide. We still had to sprint through some of the sketchier bits.
Probably the best photo I’ve ever taken.
Special ! Alert ! Section
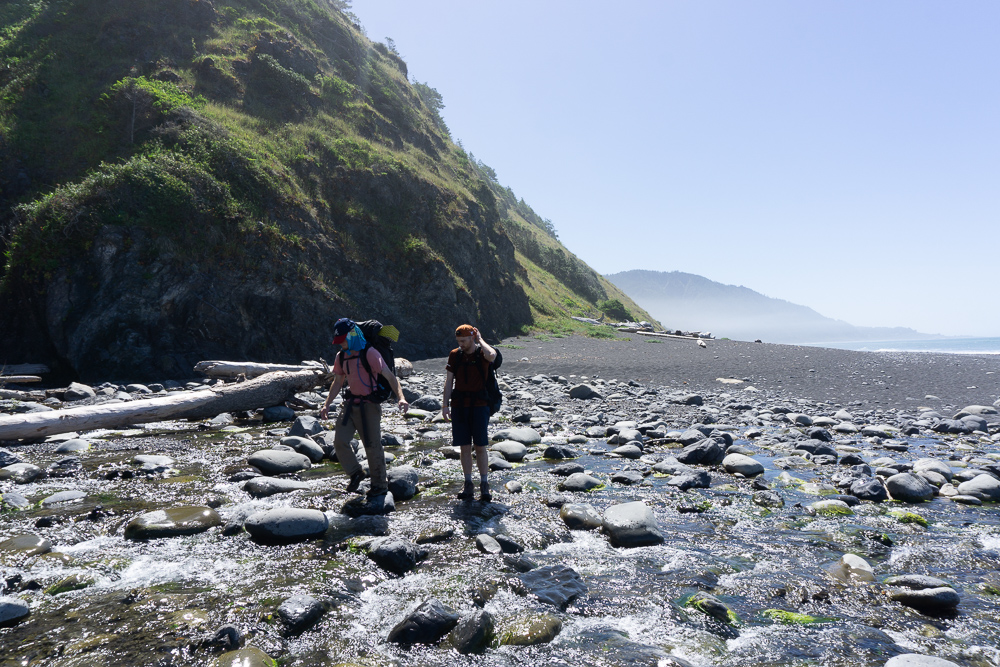
There are three areas on the Lost Coast Trail that are only passable during low tide. Low tide is when the water level is at its lowest and the greatest amount of sand beach is exposed. If you end up in one of these “low-tide” zones when the tide is high, you might get trapped between the intense ocean waves and rugged cliff walls. And the worst part is that if you do get stuck, it’s really hard to find areas where you can climb up the cliffs to higher ground. We actually attempted to cross one section when the tide was a bit high and ended up racing the waves to get from mini-sand cove to mini-sand cove. The tide wasn’t even at its highest then!
Figuring out when you can hike based on the tides is super important. You can hike in the “low-tide” areas approximately two to three hours before and after official low tide. This means that you have to start crossing these areas as the tide is going down and make sure to hike fast enough to clear the areas before the tide rises too much. I made a sketch of where the “low-tide” zones are and added a picture of what the area looks like in real life. It’s not too stressful, but it’s definitely something you need to plan for. Click here for a very useful tide charts at the Lost Coast. I recommend taking a picture or printing the tide chart for your trip dates so that you don’t have to rely on memory alone or cell service to remember all the information.
If it seems like too much effort to plan your trip around the temperamental tides, you can avoid the “low-tide” zones entirely by hiking only the middle portion of the trail. The middle portion has enough sand beach to keep the trip easy and low-maintenance. We did this for our first trip and I liked not having to worry about being swallowed up by the tides.
Either way, the tide situation is not too scary. You just have to do a little bit more prep work to make sure you’re hiking at safe times.
Getting There
The experience of getting to the trailhead will be worlds different depending on which trailhead you chose. If you decide to start at Black Sands Beach or Mattole Beach, it won’t be a big hassle. The roads into these trailheads are very windy but doable in any type of car. Black Sands Beach is right next to the town of Shelter Cove, which is a nice little coastal town with lots of big-money vacation properties and a well-stocked general store for last minute food and drink. The closest town to Mattole Beach is Petrolia, which I’ve never been to, but based on Google maps, there’s not much there. I found one general store that appears to be inside someone’s house.
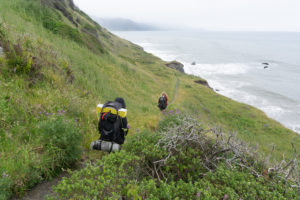
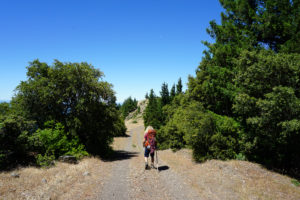
On the other hand, if you pick one of the trailheads that start in the middle of the Lost Cost Trail, you’re in for a wild ride. On our first trip, we chose to start our hike from the Kelsey Ridge trailhead which is on South Etter Road. This trailhead is the second of three trailheads that start from this road. We chose Kelsey Ridge because it has the shortest hike to the beach.
I don’t know if I would call the roads in this mountainous area “roads” – more like wide hiking trails that happen to sometimes fit a car. We made the drive in our Subaru Crosstrek but it was a PROCESS. Picture a steep road with a vertical cliff extending upward to your left and a straight vertical drop to your right – and only enough room for about 7/8ths of your car. Needless to say, I’m infinitely thankful that Dylan is a precise driver.
We even had an adventure finding the turn into South Etter Road off of Wilder Ridge Road. We followed Google Maps, but the GPS ended up taking us into someone’s private property, and people in this area are very into their private property rights. Luckily, a very nice woman came out of her house to guide us to South Etter Road. My guess is that this happens often.
Once you locate the road and get the hang of driving on it, finding the trailheads is easy. You just keep driving down Etter Road until you get to your chosen trailhead. The trailheads are well labeled and there’s always enough parking. During our trip, we were to only people in the parking lot.
There’s no kiosk at the trailhead to sign in or leave any information about why your car is parked there, so we left a note on our dashboard with our trip dates and permit number. We’re always avoiding parking tickets and towed cars! (Although someone would have to be very determined to tow a car from here… and perhaps have access to an air lift?)
Anyways, once you’re parked, you’re ready to hike.
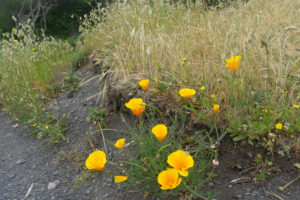
Cool plant near our campsite.
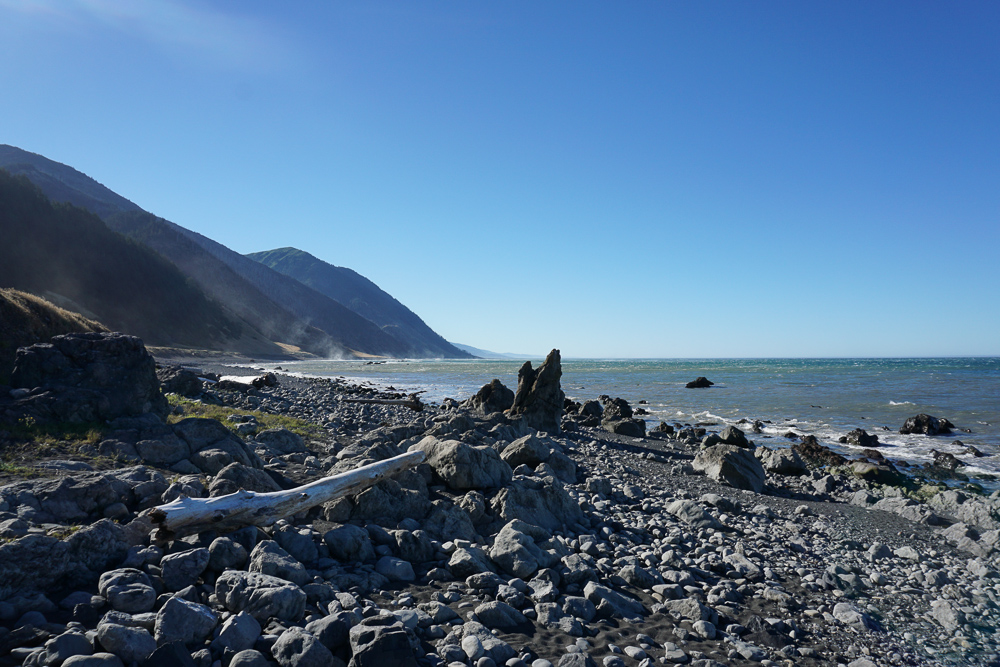
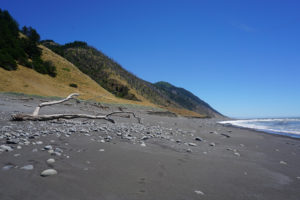
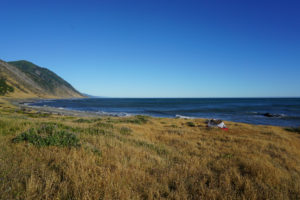
Coastal plains at the middle section of the trail.
On the Trail
Since we did two different versions of this trail, I’ll describe both. We explored the middle section on the first trip and the southern section on the second trip.
Middle Section: Kelsey Ridge
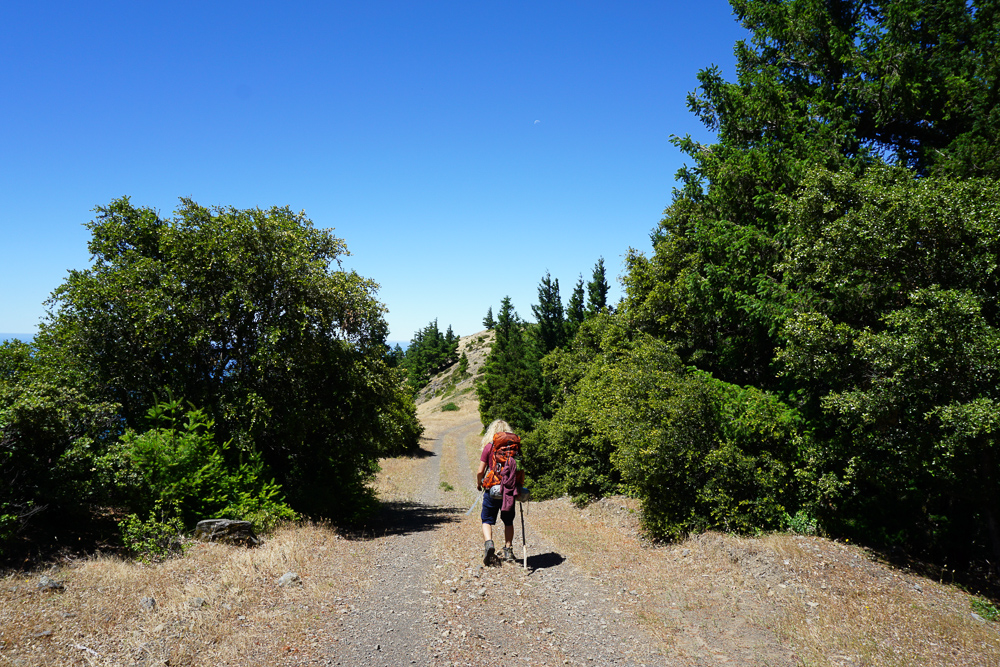
The first four miles of trail are a relatively uneventful downhill stroll on an old narrow road. I think the park service still uses it as a real road but it’s closed to public traffic. Occasionally, the trees part and you get some glimpses of the Pacific Ocean and the beach down below.
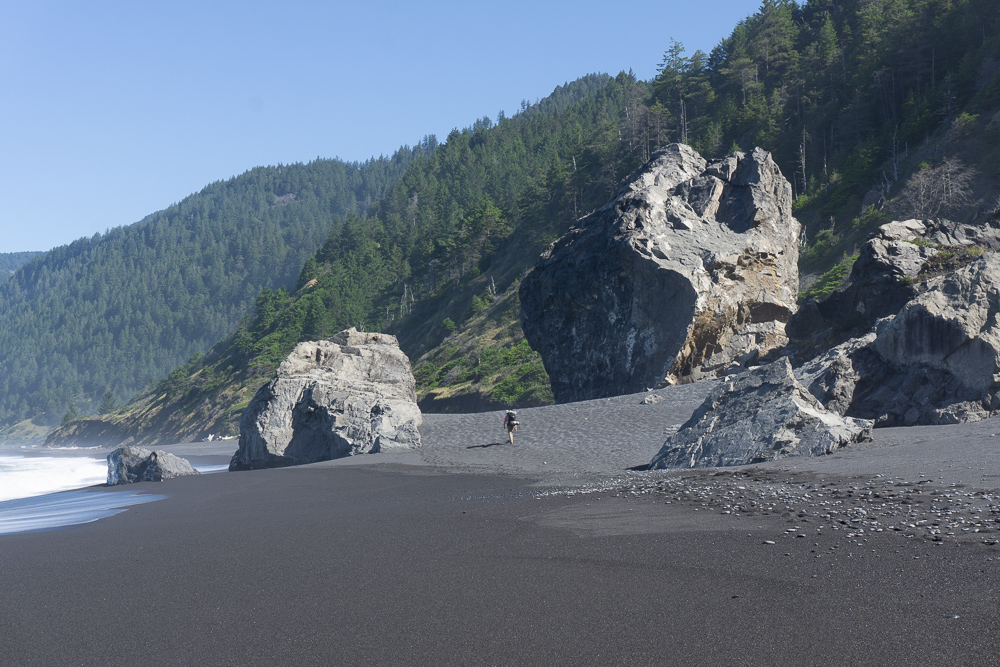
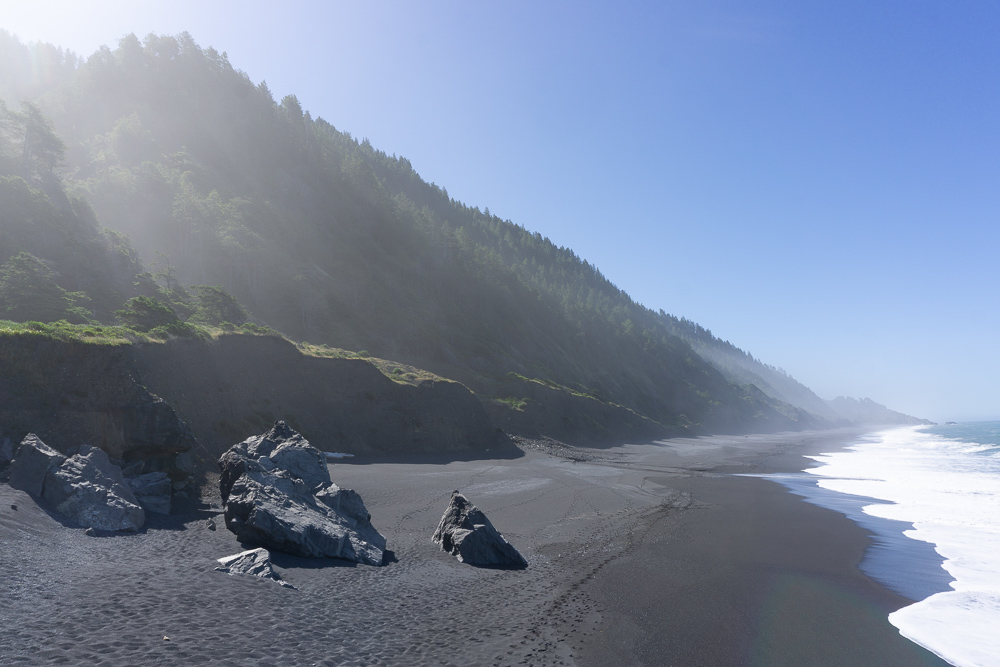
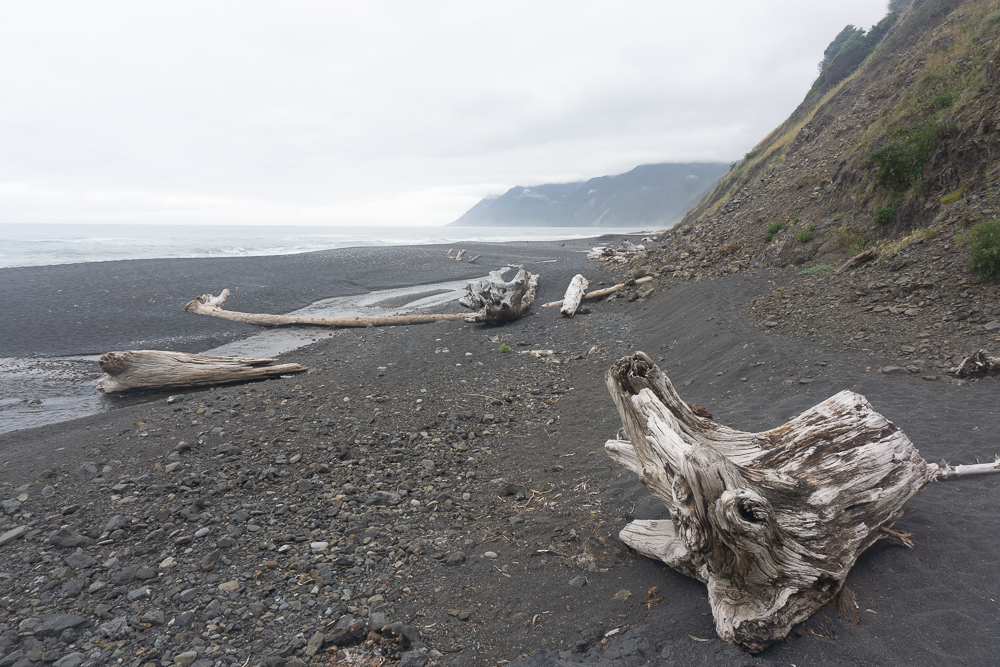
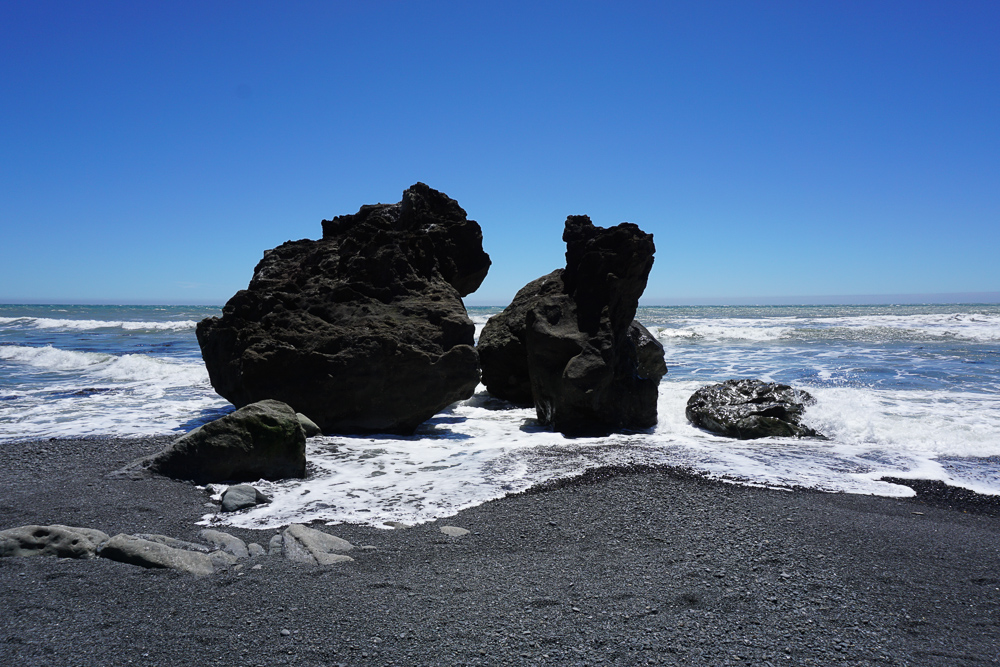
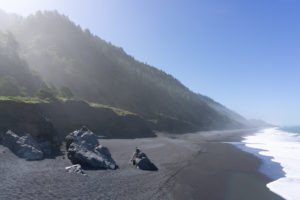
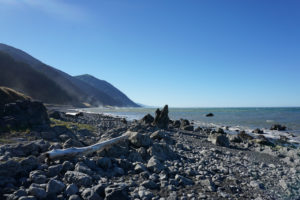
After some gloriously easy downhill hiking, you’ll emerge from the trees onto the beach of your dreams – clean black sand, roaring ocean waves, and views of the coast as far as the eye can see. If you had a postcard of the California Coast, this would be it.
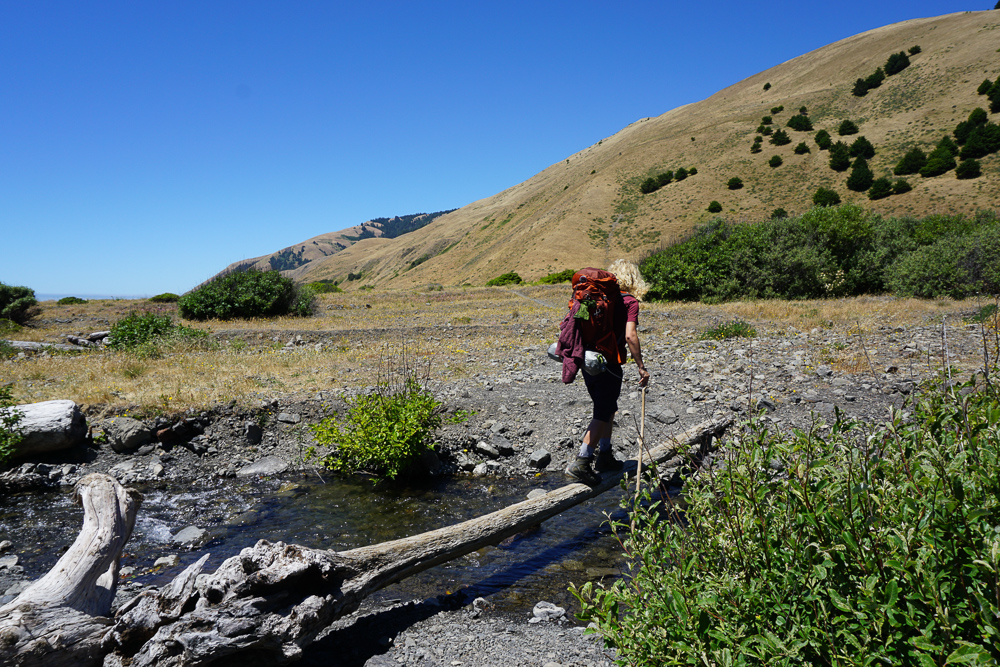
From here, you can head either left or right down the beach – or you know, just try not to walk straight at the Pacific Ocean. If you go left, you’ll get to a “low-tide” zone faster than if you head right, so we chose to go right. Our goal was to hike all the way to the northern “low-tide” zone and then turn around and look for camping. I’m not 100% sure we made it, but we did notice the sand beach start to narrow. One thing we didn’t expect is how hard it was to walk on sand for such a long time. The difficulty level is about the same as walking on 6 inches of fresh snow without snowshoes.
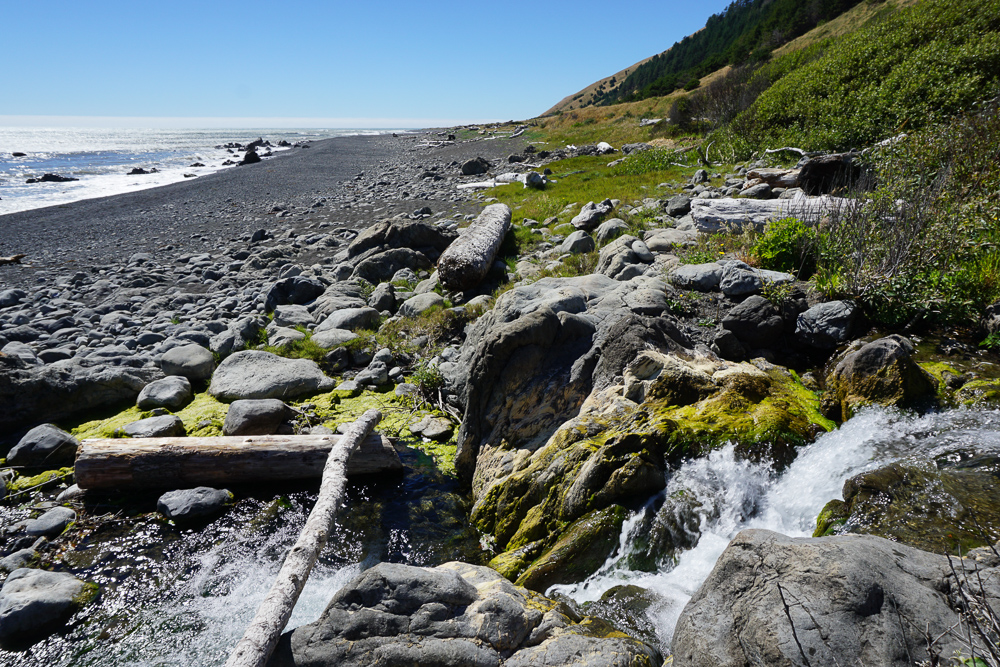
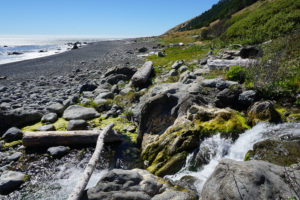
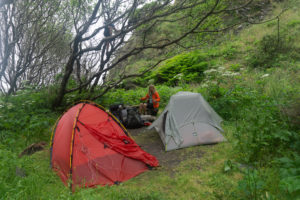
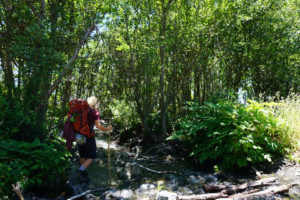
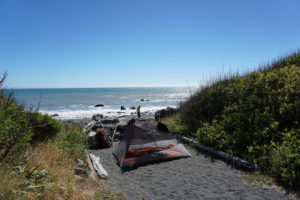
When you’re ready to set up camp, look for spur trails around mountain streams and waterfalls. If you’re lucky, you’ll find a cozy campsite nestled into the plant life around the streams. You can also camp in the wide open meadows, but you’ll get a lot more wind than if you camp by the creeks. We set up camp next to one of those mountain streams and had the beach pretty much to ourselves.
Southern Section: Black Sands Beach
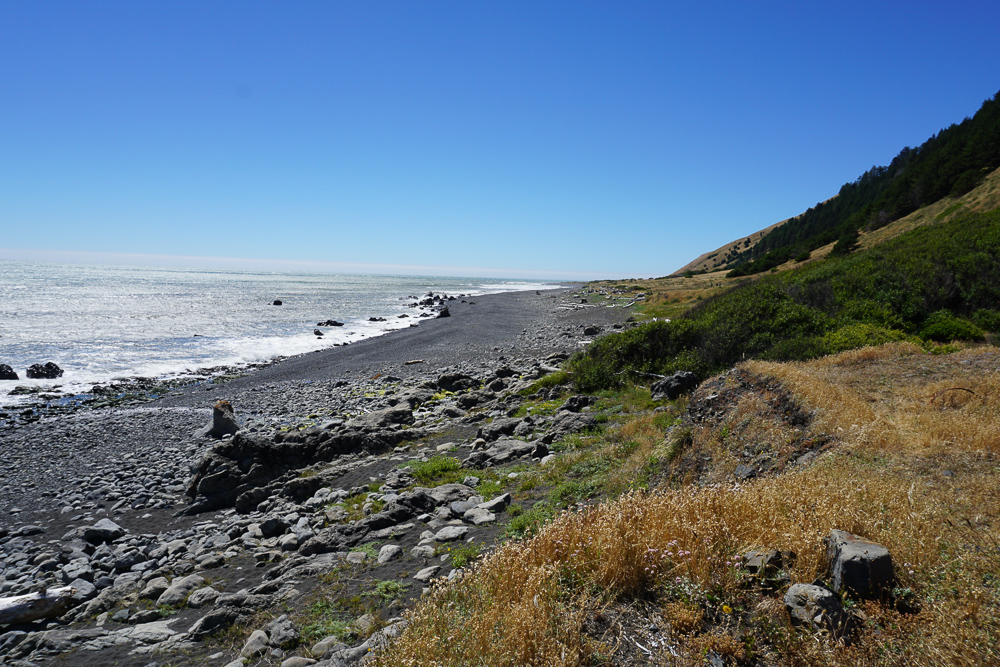
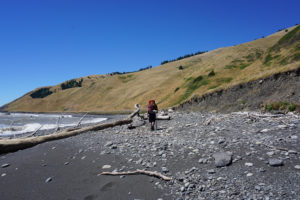
Starting from the southern trailhead puts you at the beach right away. From the overlook parking lot, you head down to the beach and hike north as much as you’d like. If you have the time, you can always hike all the way to the northern trailhead at Mattole Beach and then hike back south. My guess is that that would take at least 5 days.
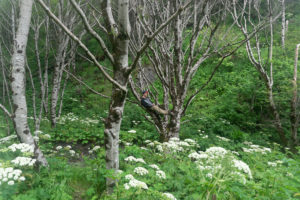
During this trip, we gave ourselves three days to explore the coast and made it 8.25 miles north to Big Flat. At Big Flat, we pitched our tents in the trees and went exploring. The next day, we camped at a cozy spot next to Horse Mountain Creek. There were a bunch of excellent climbing trees and a waterfall that flows directly into the ocean. When you’re looking for camping spots along the trail, look for spur trails near creeks and waterfalls. These trails will almost always lead to an awesome camping spot (sometimes with a fire ring). Plus, if you camp in a spot that’s already been established, you reduce your impact on the environment.
After the Hike
Depending on how hungry you are and how long you’re willing to wait for food, there are a lot of good food options on the drive back to the Bay Area. If you can wait three hours for lunch, there’s a very famous brewery in downtown Santa Rosa that serves very tasty comfort food – think pizza, wings, and beer. The brewery is called Russian River Brewing Co. and every single beer person in the world knows about their IPA.
If you’re more in the mood for seafood and are okay with taking a one hour detour, you can venture to Bodega Bay for a crab sandwich at Spud Point Crab Company or Fisherman’s Cove. Spud Point sometimes has a long line but Fisherman’s Cove next door is usually line free — both are delicious.
Supply List
The Usual List
Backpack
Tent
Sleeping Bag
Sleeping Pad
Sleeping Bag Liner
Camp Stove
Lighter or Matches
Cooking Pot
Food
Water Vessel
Water Filter
Headlamp
Clothing
Trip Specific Things
Bear Canister
The park requires you carry one. It keeps bears and other forest friends from getting into your food and other smelly things. We use the BearVault BV450 Food Container and we love it. It’s durable, light and fits all of our food for two to three day trips. To learn how we fit three days of food (for 2 to 3 people) into a decently small bear canister, click here. If you don’t own a bear canister, you can rent one for $20 at the Shelter Cove General Store (open every day from 7:30 am to 6:30 pm).
Wide-Brimmed Hat
The best way to look like an old-times explorer, while protecting your beautiful skin from the cruel sun. There’s no shade on the beach at all, which makes bringing a good hat very important on this trip.
SMART Water Bottle with Small Sawyer Filter
This trail has fairly consistent access to creeks and streams along the way. On trails with consistent water access, we usually just fill up a SMART water bottle, screw in the Sawyer filter and drink straight from the filter spout. It saves us time, and makes it to where we don’t have to unpack our entire backpack to get to our water reservoir. Why specifically SMART water bottles? They’re durable and somehow one of the only bottles that the Sawyer filter is compatible with.
Rain Jacket
The wind here is significant. I was happy and cozy in my rain jacket.
Thinking about doing this trip? Have any questions? Comment down below!
More Happy Packers
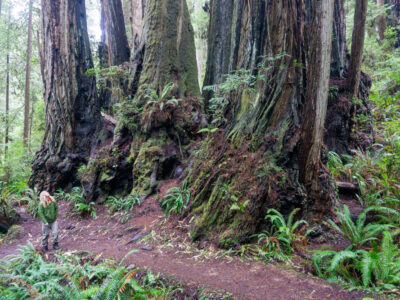
This loop is a tour through the many wonders of Redwood National including the famous big trees, a moody beach, and the mystical Fern Canyon.

This is the perfect any-season beginner trip for anyone wanting to dip their toes in backpacking.

Animals in the wilderness can be scary, but they don’t have to be. Here’s how to feel perfectly at home with the bears and mountain lions.