24 Oct Lakes Trail, Sequoia National Park


guides // backpacking // northern california
Lakes Trail, Sequoia National Park, California
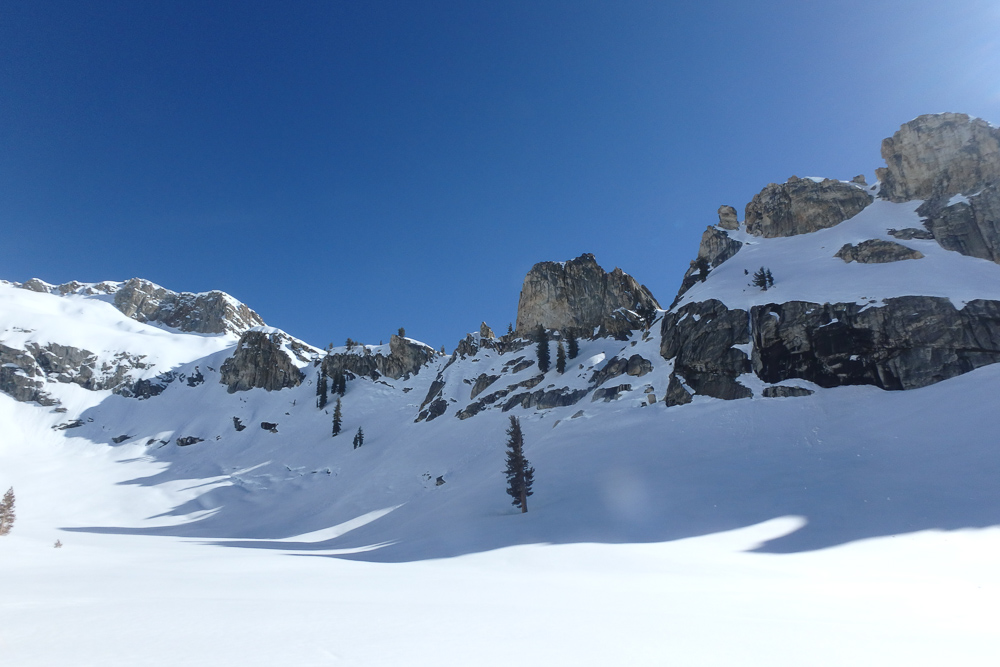
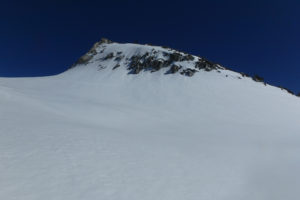
It may just be me, but I’m always ten times more excited to get to camp in the winter than in any other season – make that twenty times more excited during this trip. This is a very challenging hike that has quite a bit of route-finding, but the pay-off is amazing. We were able to pitch our tent right next to a frozen Pear Lake, beneath an intense exposed rock face. The last mile of the approach is an incredibly steep, snowy slope that you’ll need either snowshoes, skis or some other equipment on your feet to safely cross. Of the three groups we saw out there, we were the only ones who attempted the slope and made it to the lake.
For an extremely detailed article about how to get started with winter backpacking, click here.
Quick Notes
Pictures taken April 2017
Total Distance: 11.5 miles
Elevation Gain: 2,872 feet
Days: 1 Night
Difficulty: Medium
Hike Type: Out-and-Back
Trailhead: Alta Peak Trailhead
Seasons: All
Permit Requirement: Yes, Year-Round
Camping: Dispersed Camping
Map: National Geographic Sequoia National Park & for winter travel, purchase “Cross Country Ski Trails” map from the Giant Forest Museum
Water: Filter along the way

When to Go
As you can see, we took this trip in the dead of winter during a record high snow year for the Sierra Nevada. That said, this trail is most popular during the summer and fall. During peak season, it makes for a great beginner backpacking trip because the mileage is manageable and the majestic camping spots at Pear Lake are great for inspiring new backpackers. However, with all the positives comes one big negative – getting a backcountry permit can be very challenging during peak season. That’s where winter backpacking comes in.
We love this trail for beginner winter backpacking because the mileage is still fairly manageable for snow travel and the park puts yellow blazes (markers) on the trees to guide your way. The blazes aren’t 100% easy to follow, but at the very least, the blazes are a good way to confirm that you’re going the right direction.
This is also a nice place to start learning how to winter backpack because you have to option of sleeping in the cozy Pear Lake Ski Hut, rather than sleeping outside and having to upgrade a lot of your gear for the cold. The ski hut fills up fast though, so you’ll have to enter the lottery by November 5th to get those coveted weekend dates.
The best (and only) way to check current trail conditions is to talk to a Sequoia park ranger at (559) 565-3341. I’ve noticed that some of the information you’ll get about snow depth isn’t entirely accurate though, because the rangers don’t regularly patrol in the winter. The best thing to do is monitor the weather about one to two weeks before your trip to gage how much fresh snow will be on the ground. And even if there’s not a lot of fresh snow in the weather, I would always recommend bringing snowshoes.
Trip Cost
Park Entrance Fee*
Wilderness Permit Fee
$35
$10 per permit + $5 per person (only during quota period)
*If you know that you’re going to be going to a national park more than three times in a year, it’s worth it to buy a National Parks Pass. They’re $80 and sold online, at all REI locations, and National Park Visitor Centers.
Before You Go
In the winter, you don’t have to do anything before you go, but you still have to grab a backcountry permit when you get to the park. Sequoia National Park requires that all overnight travelers have a backcountry permit, but because the winter season typically falls outside of the quota period when the park limits how many people can backpack on a trail per day (May 25th – September 22nd), it’s very easy to get a permit. You just stroll up to the Giant Forest Museum off of the Generals Highway and self-register at the kiosk next to the museum. There’s also park rangers stationed inside the Giant Forest Museum that can answer any last minute questions.
Another big reason to stop at the Giant Forest Museum is to pick up a winter trails hiking map. The map was extremely useful for us because it showed all the winter trails and their designated blazes. There are a lot of winter trails in the area, so it’s very easy to accidentally follow a different trail and end up lost and confused (like we did!).
During the winter, I like to improve our chances of not getting lost by mapping out the route on the Strava app. The creators of Strava probably didn’t intend for people to use their app to map out backpacking routes, but it does a pretty good job of it. In the winter, when trails are harder to follow, I download the route onto my phone and use it as a last resort for finding our way back to the trail. Bonus pro-tip: download the route at home before you get lost; there’s no service in the backcountry.
One more app that ends up being incredibly helpful is the Hiking Project app by REI. I’m actually phasing out my Strava maps for Hiking Project maps because the REI app has more hiking trails and the routes are already programmed in for you. Additionally, they have more accurate elevation profiles and sometimes have information input by users about current conditions.
During the summer, the process of getting a backcountry permit is a bit more difficult. The trail is so popular that the park doesn’t allow wilderness permit reservations, like they do for the rest of the park. Permits are only available on a first-come-first-serve basis at the Lodgepole Visitor’s Center and you have to get there super early to get a permit.
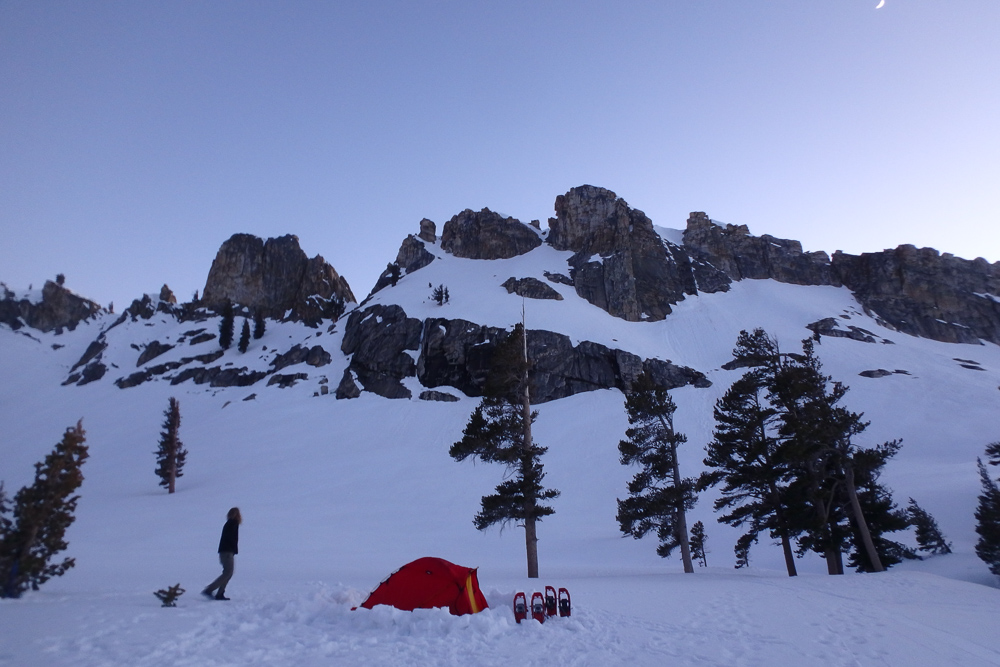
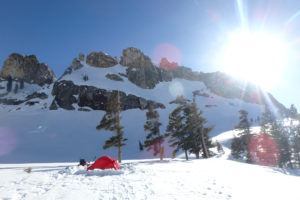
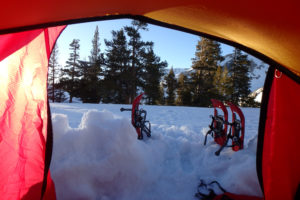
Camping at Pear Lake.
View from inside the tent.
Getting There
The trail at the Wolverton Ski Area, on the north side of the park. The road to Wolverton is just south of the Lodgepole Visitor’s Center on Highway 198 (General’s Highway). There’s no convenience store at the Wolverton area so we stock up on last-minute food and supplies at the Lodgepole Visitor’s Center. Lodgepole also has payed public showers and ski/snowshoe rental.
One of the main reasons this is such a good winter trail is that the roads leading to the trailhead are almost always open – which is a luxury in the mountains. The only time the roads may be closed is while they’re plowing after a huge snow storm. The Sequoia National Park website has a really useful web page with the general status of all the roads in the park. As always, check road conditions before you go to avoid grumpiness and a mandatory adventure pivot.
Before you head to the trailhead at Wolverton, you’ll have to first stop at either the Giant Forest Museum in the winter or the Lodgepole Visitor’s Center in the summer to pick up your backcountry permit. The Giant Forest Museum is just south of the road to Wolverton but the road is windy and you’ll pass the crowded parking area for the famed General Sherman tree, so budget a little extra time to travel between these two points.
After picking up a permit, you can head to the Wolverton Ski Area and find the parking lot that’s closest to the trailhead. Don’t forget to display the car tag portion of the self-registered permit so that you don’t have any car issues. After all that, you’re ready to hike!
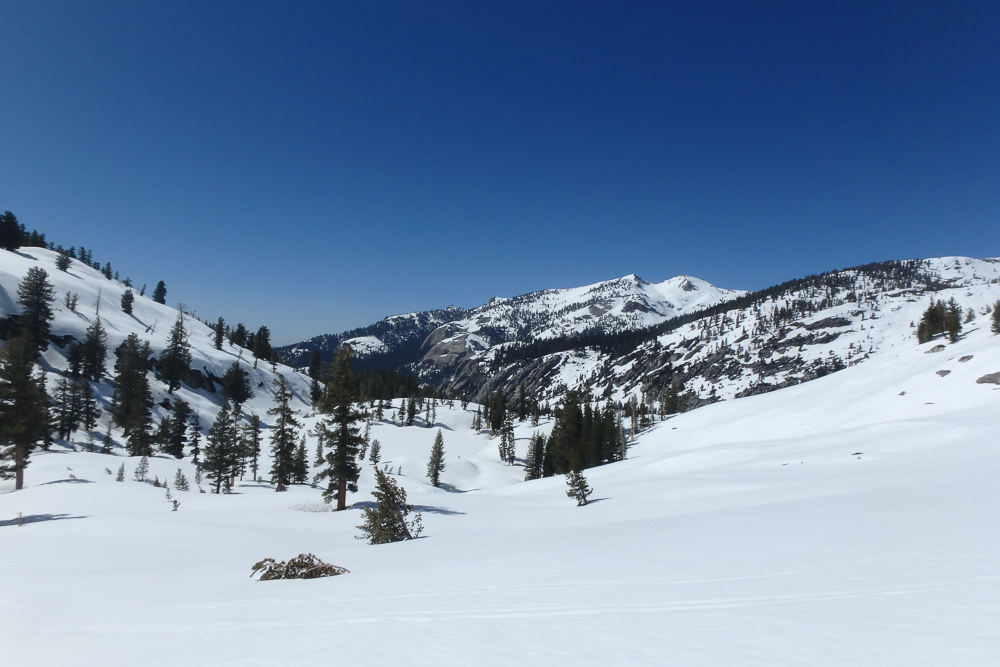
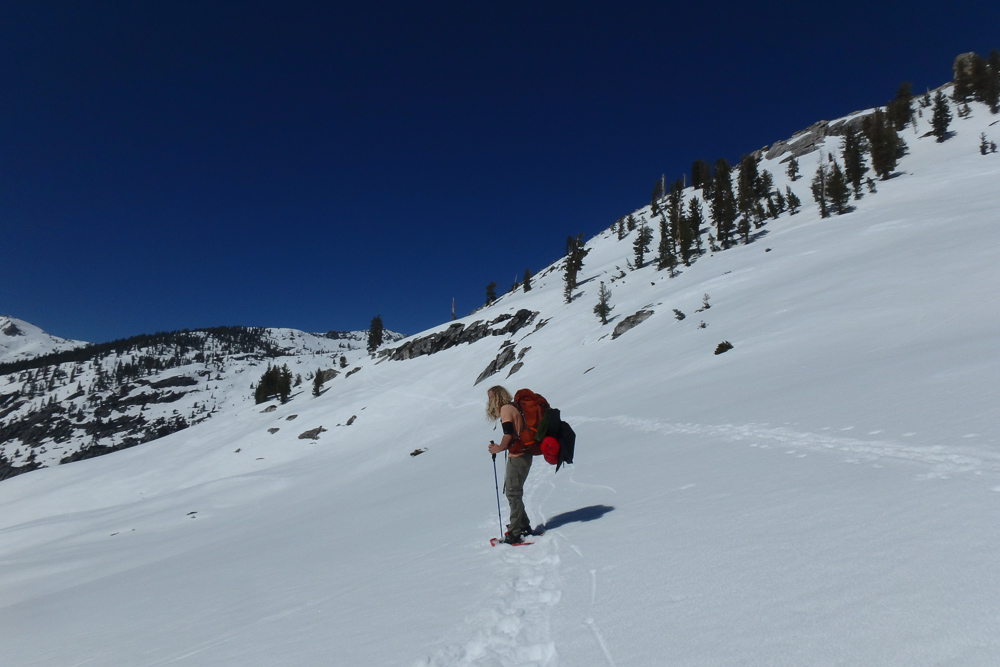
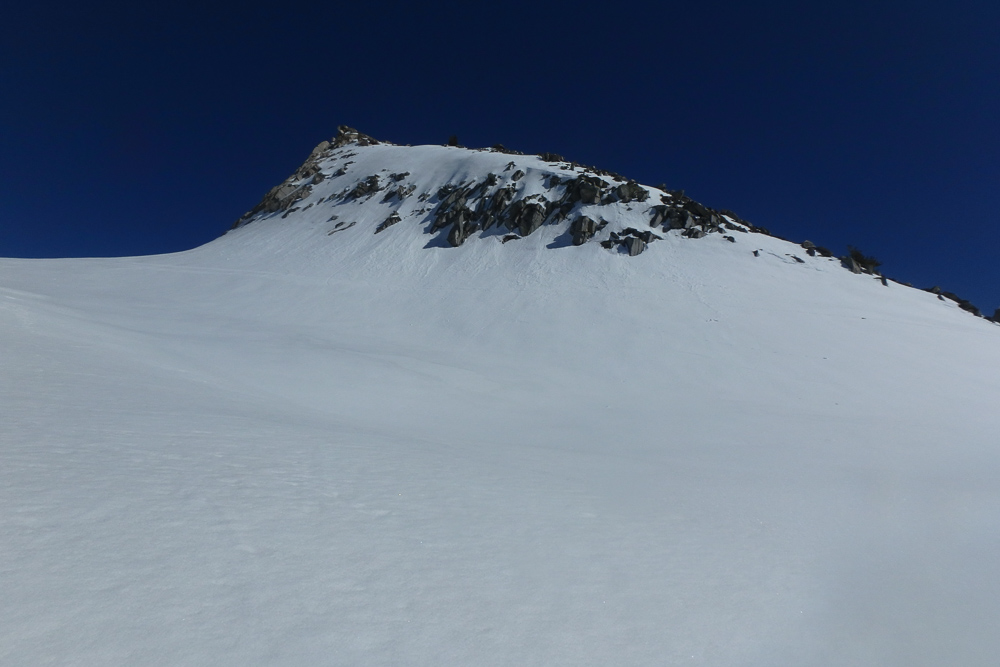
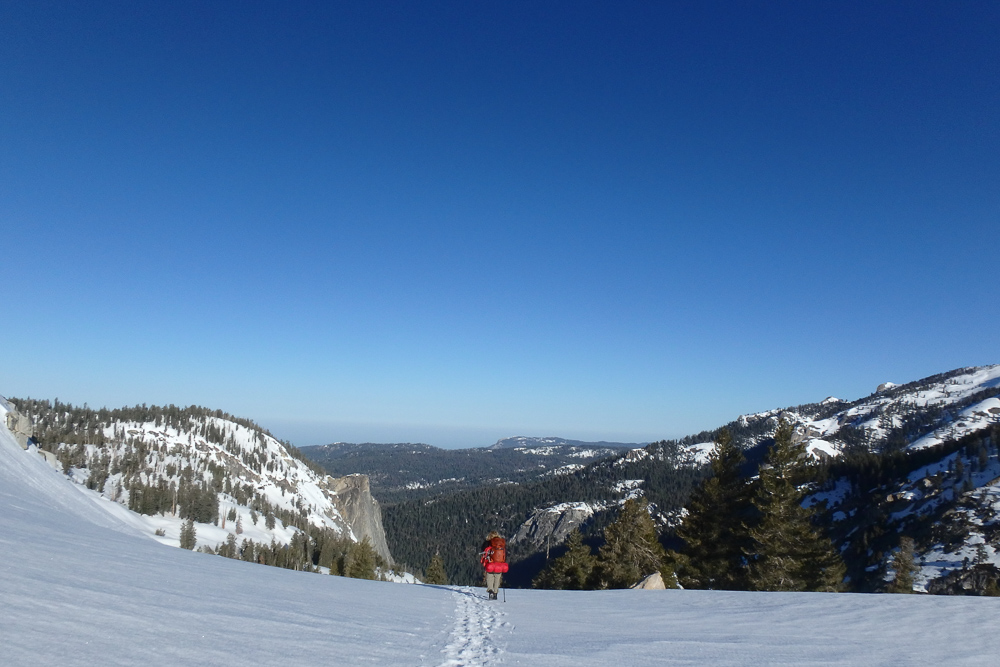
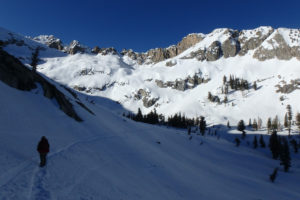
Snowy expanse on the way to Pear Lake.
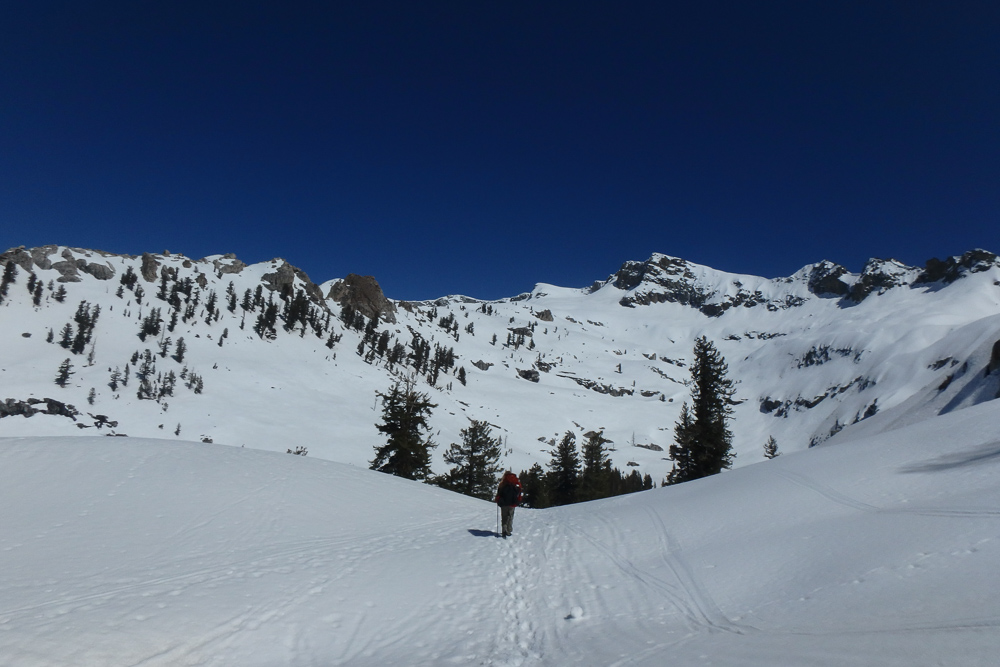
The big, bad scary slope that took 45 minutes to cross.
On the Trail
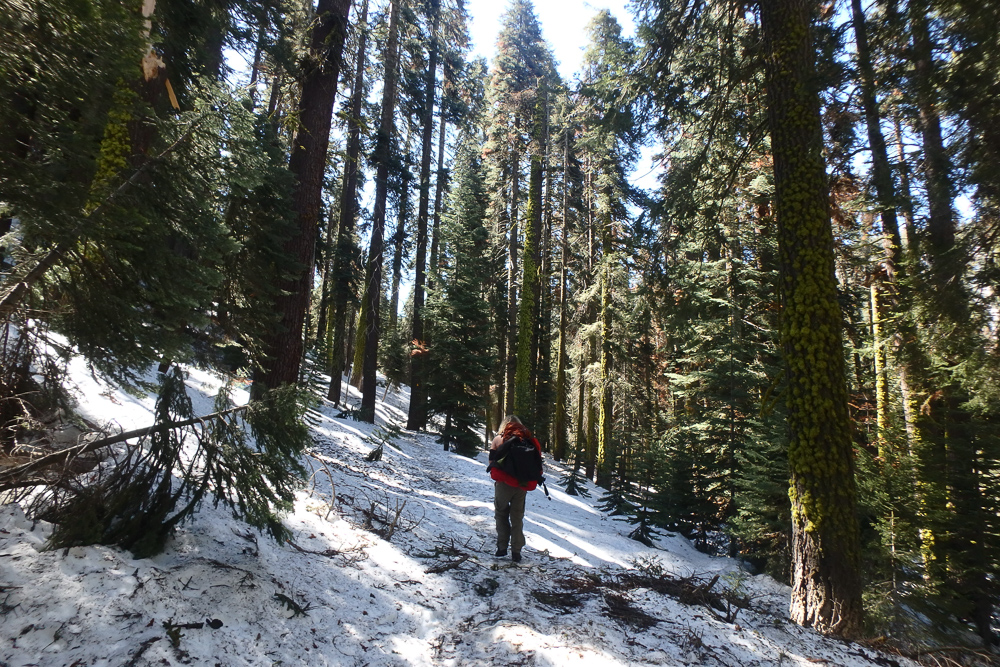
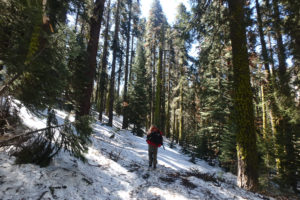
The trail starts out in the woods with some pretty easy hiking – you may not even need snowshoes here, but don’t be fooled, you’ll probably need them later. There are a couple winter trails in the area so make sure you pay attention to the symbols on the blazes. The blaze for the Lakes Trail should be a yellow triangle but sometimes the blazes are faded and hard to read.
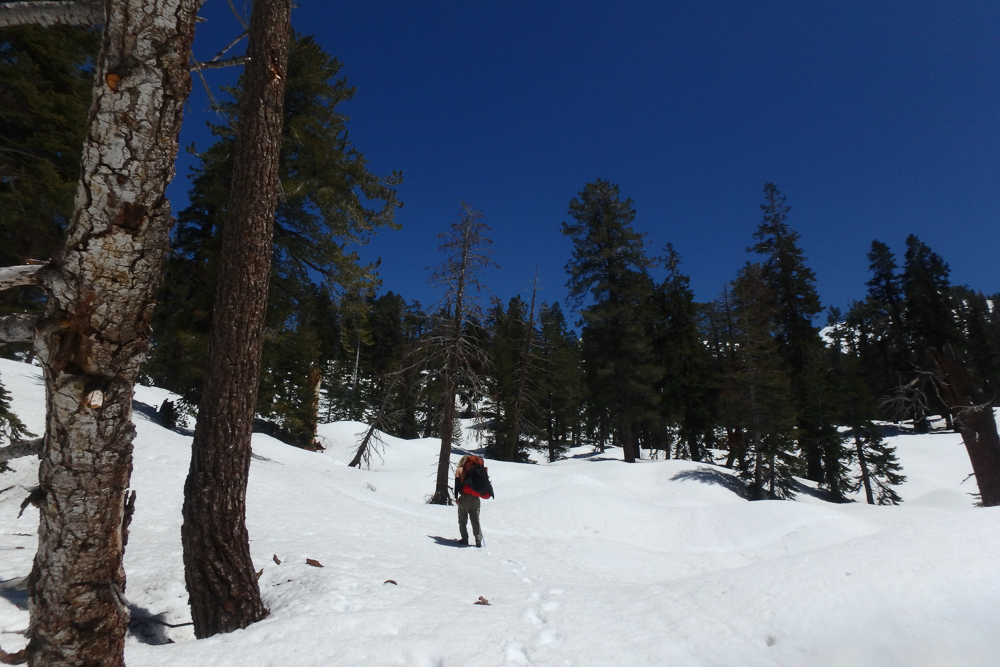
After about 1.5 miles you’ll encounter a hill so steep that you’ll have doubts that the trail is actually in that direction – it is. We actually got a bit lost here because we didn’t believe we had to go up the hill and ended up following a different trail for a while. After ascending the giant hill, the trail winds in and out of the tree line. There are a couple open clearings in this area where the tree blazes become hard to spot – a hiking partner with eagle eyes is very useful here.
After about 3 miles, you’ll be fully out of the tree line and the whole world will look like a big snow blanket. It’s a surreal experience being out there in such a hostile environment, but it’s also really quiet and peaceful because the snow muffles all sound. After some pretty majestic hiking you’ll get to the steep slope that I was talking about in the intro. Hopefully you brought snowshoes/crampons/microspikes because you’ll probably need them. We ended up bringing snowshoes and they did the trick, but the path we took was a little too narrow to fit both snowshoes so we had to precariously walk heel-to-toe the entire time. It took us about 45 minutes to cross the entire sloped area, which is about 0.3 miles long.
Safety Note: If you end up slipping down the slope, try your best to flip over onto your stomach and dig your elbows and knees into the snow to slow you down. The best example I’ve found on how to self-arrest when sliding down a snowy slope is this YouTube video.
After the slope-y crossing, you’re in the clear. It’s a relatively easy hike to Pear Lake and some very epic camping spots. One more thing – you won’t know exactly where the edge of the lake is because the snow piles up and makes the edge hard to find. We tried to camp in a spot where we were completely sure that the lake wasn’t underneath us to avoid waking up under water.
After the Hike
If you’re heading south out of the park, you’re in luck. There’s a modern diner in Three Rivers called ol’Buckaroo that serves all kinds of tasty treats. They’re located right by the river (great views from the back porch) and they have really good vegetarian options. I wish every park had an ol’Buckaroo on the way out.
Supply List
The Usual List
Backpack
Tent
Sleeping Bag
Sleeping Pad
Sleeping Bag Liner
Camp Stove
Lighter or Matches
Cooking Pot
Food
Water Vessel
Water Filter
Headlamp
Clothing
Trip Specific Things
Bear Canister
The park requires you carry one. It keeps bears and other forest friends from getting into your food and other smelly things. We use the BearVault BV450 Food Container and we love it. It’s durable, light and fits all of our food for two to three day trips. If you don’t own a bear canister, you can rent one for $5 at the Tuolumne Meadows Wilderness Center.
{Winter Stuff}
Assembling a backpacking kit during the winter is a bit more involved than during the warmer months. Click here, for a full lesson on how to upgrade your regular kit to a winter kit. Here’s a cliff-notes version:
Winter Hiking Trails Map and Strava App or Hiking Project App
Without this map and a back-up app, we’d probably still be wandering around the park. Seriously, winter navigation is hard and you’ll need some good tools to help you figure it out.
Sleeping Pad
We bring our sleeping pads on almost every trip, but it’s extra important to bring a sleeping pad on trips where you’ll be sleeping on snow. The sleeping pad elevates you off the ground and most sleeping pads are made of a material that reflect your body heat back at you. On our first snow trip ever, I had this idea that snow is “soft” and I didn’t need my sleeping pad – don’t be like me. I froze, slept no hours, and it was not fun.
Sleeping Bag Liner
After having a good sleeping pad, the next piece of gear to upgrade for winter travel is your sleeping bag, but good sleeping bags can get expensive. I recommend adding a sleeping bag liner into the mix before upgrading your sleeping bag. Sleeping bag liners can improve the rating on your sleeping bag by 20°F and cost way less than a new sleeping bag.
Four-Season Tent
These are expensive and not 100% necessary, but having a four-season tent does significantly increase comfort on snow trips. We have the Hilleberg Jannu, and this thing insulates and blocks wind almost as good as our actual house. At 7 pounds, it’s also surprisingly light for a four-season tent. It costs a whopping $975, so this is the very last thing we upgraded in our winter backpacking kit.
Hand-Warmers
They’re just so cozy in the morning. We keep a pair of these hand-warmers in our packs year-round just in case the weather gets colder than expected or we need a little extra warmth. We also stick them in our boots on extra cold mornings when our boots freeze overnight.
Thinking about doing this trip? Have any questions? Comment down below!
More Happy Packers
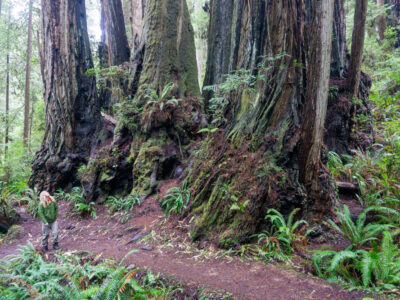
This loop is a tour through the many wonders of Redwood National including the famous big trees, a moody beach, and the mystical Fern Canyon.

This is the perfect any-season beginner trip for anyone wanting to dip their toes in backpacking.
Animals in the wilderness can be scary, but they don’t have to be. Here’s how to feel perfectly at home with the bears and mountain lions.