26 Nov Lake Aloha, Desolation Wilderness


guides // backpacking // northern california
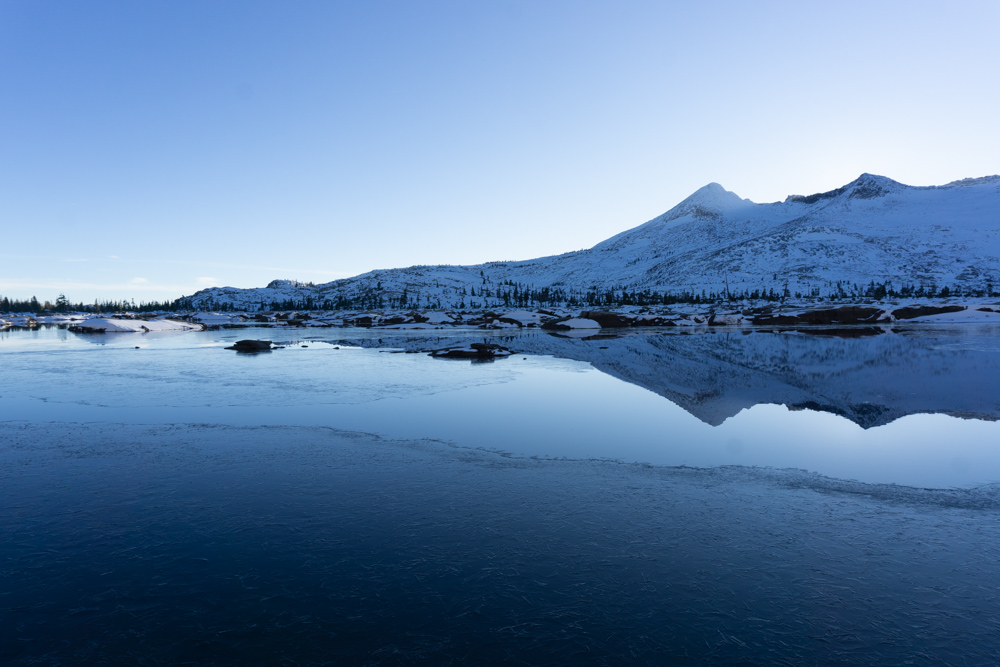
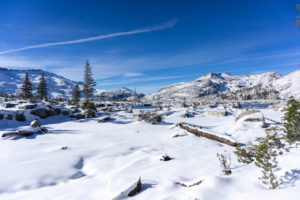
Lake Aloha, Desolation Wilderness, California
The trail to Lake Aloha takes you through some of the most beautiful nature in the Lake Tahoe area. It’s got dramatic granite peaks, lush forests, and — since we went in winter — perfectly untouched, sparkling snow. Plus, compared to the rest of the Sierra Nevada, the elevation gain in this area is not too crazy. Combine the low elevation gain with glorious lakeside camping and you have a perfectly relaxing summer trip or a great beginner winter trip.
Quick Notes
Pictures taken November 2017
Total Distance: 15 miles
Elevation Gain: 2,000 feet
Difficulty: Medium
Days: 1 Night
Hike Type: Out-and-back
Trailhead: Echo Lakes Trailhead
Seasons: All
Permit Requirement: Yes, Year-Round
Camping: Dispersed Camping
Map: Desolation and Granite Chief Wilderness National Geographic
Water: Filter along the way


When to Go
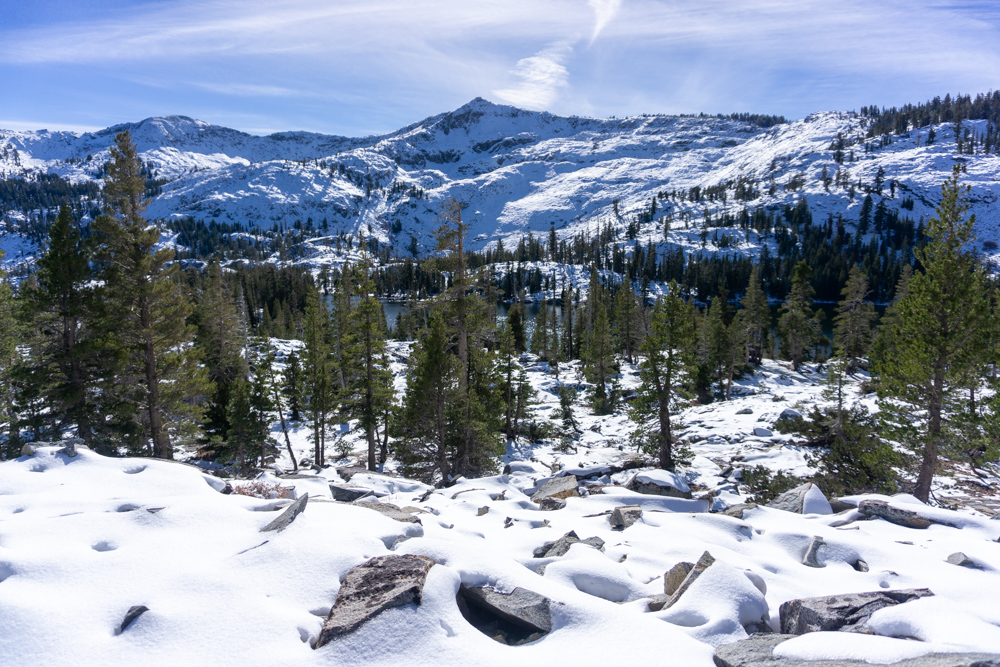
We took this trip in early winter, right before the big snows started piling up. The whole place was in transition between fall and winter so we got some easy snow-free hiking in the beginning and then transitioned to full-on winter as we hiked further in. When we finally got to the lake and our camping area, everything looked like a beautiful snowy wonderland.
This trip works well for winter backpacking because it’s one of those trails that’s so popular in the warmer months, but as soon as snow starts falling, there’s absolutely no one around. It’s also pretty much the ideal distance for winter backpacking trips. Not so long that you rethink all your decisions along the way, but not so short that you arrive at camp way too early.
If you prefer to avoid the cold, you can trade snow in for the crowds that swarm Lake Tahoe in the summer and fall. The place is absolutely beautiful in the summer and people want to see it. The Desolation Wilderness is so popular that getting a permit during summer means making your reservation 6 months in advance — but more on that later.
Checking Current Conditions
~ winter only ~
Lake Aloha is close to a couple ski resorts so you can easily consult the resort pages for snow pack. Ski resorts are obsessed with snow depth so they’ll probably have the best information around. The closest big resorts are Kirkwood (snow camera) and Olympic Valley, but you can also check the smaller resorts like Homewood for snow depth questions.

Trip Cost
Wilderness Permit Fee
Wilderness Permit Reservation
SNO-park Parking Fee (Winter Only)
Water Taxi (Optional)
$5 per person for the 1st night; $10 for 2-14 nights
$6
$5 per day or $25 season pass
$15.00 per person (pack included) ONE WAY
There’s is a three-person or $45 minimum to run a taxi

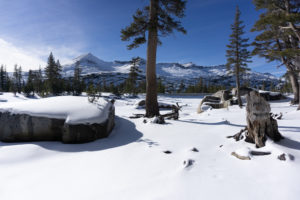
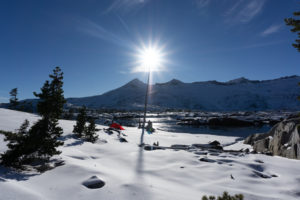
One of the best things to see in the wilderness.

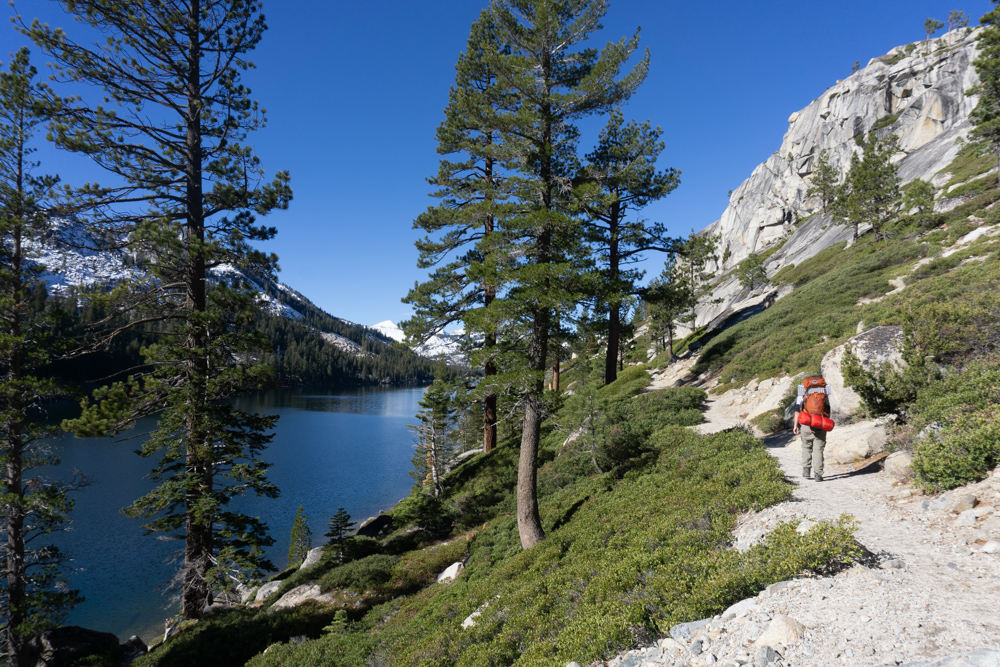
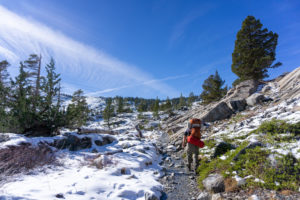
The trail right before the trees closed in on us.

Before You Go
First, you’ll have to reserve your backcountry permit. The Desolation Wilderness requires all day-hikers and overnight visitors to have a backcountry permit — yes, even day-hikers. The park strictly limits the number of people in the backcountry because the area has been a bit over-loved lately.
Between Memorial Day and September 30th the park has a quota for the maximum number of people on the trail. Only 36 overnight visitors are allowed in the Lake Aloha area per day. If you want a permit for the busiest times (especially on weekends), you’ll have to reserve your permit right when reservations open up, which is 6 months out from your trip start date. To make permit reservations click here.
If all the permits are gone by the time you get around to making a reservation, fear not – the park holds back 30% of the permits for first-come-first-serve travelers. You can line up mega-early and pick up a permit at either the Pacific Ranger Station or the Lake Tahoe Basin Management Unit Supervisor’s Office. If first-come-first-serve permits for Lake Aloha are also all gone, you can try to get a permit for the Mt. Price region which includes camping along Lake Aloha’s western shore.
In the winter, demand slows down for backcountry permits and there’s no quota, but I figured I’d reserve a permit anyways because we didn’t know how early winter would actually hit that year (and reserving a permit is one of my main personality traits). Additionally, if you reserve your permit, you don’t have to stop anywhere before your trip. The park sends you your permit by e-mail and you just have to print it before your trip.
Next, if you’re going in the winter, you’ll need to buy a parking pass for the Echo Lake SNO-park parking lot. You can buy a day pass for $5, or if you know you’ll be backpacking in the Lake Tahoe area a lot, you can buy a season pass for $25. The easiest way to buy a pass is online, but you can also buy a pass by mail (if you can ever find a stamp) or in-person at one of the authorized vendors. Pro-tip though, the vendors are almost never open on weekends and they’re a bit inconvenient to get to. Before we got to the parking lot, we had no idea we even needed a parking pass, so we had to improvise and buy a pass online on my phone and then scramble to the nearest FedEx in South Lake Tahoe to print it out – not the best way to start a trip.
Finally, if you decide to cut down about 3 miles of hiking distance and take the water taxi across the Echo Lakes, you’ll need to buy your taxi ticket through the Echo Lake Chalet. The water taxi service opens and closes for the season at seemingly sporadic times, so make sure to go on your trip well into the warm season if you definitely want to take a taxi.

Getting There
The trailhead is on the south side of Lake Tahoe, just before you get to actual “South Lake Tahoe,” which is a large-ish town near the lake shore. As you’re driving down Highway 50 from either direction, you’ll turn into a road called Lincoln Highway, which will take you into the Echo Lake area. The winter parking lot is straight down Lincoln Highway at the Echo Lake SNO-PARK. The summer parking lot is right at the Echo Lakes trailhead, but there’s a severe lack of parking spots so get there early.
The rest of this stuff is for winter backpacking only:
Once you get parked, don’t forget to display the parking pass (that you jumped through so many hoops for) on your dashboard. Now you’re ready to go… take a hike on a road!
You’ll take Forest Rt 11N05 for about 0.7 miles all the way down to the official Lake Aloha trailhead. If you’re planning on taking the water taxi across the Echo Lakes, you’ll catch your boat at the Echo Lake Chalet.
Now you’re ready to hike!
Dylan trying to go for a quick swim.

Our luxury dining set-up.

On the Trail
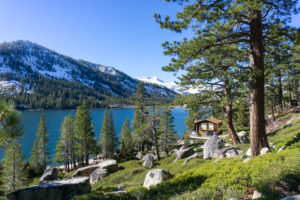
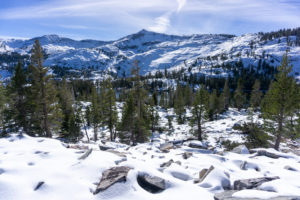
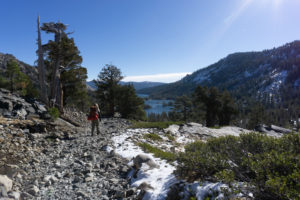
The trail begins at the foot of Lower Echo Lake and slowly starts climbing upward. You’ll soon have an amazing view of the lakes and the surrounding mountains. The scenery around Echo Lakes is beautiful and you’ll also get a nice look at some of the picturesque cabins that dot the shores of the lakes. The cabins looked so cozy that we briefly doubted why we were willingly sleeping in the snow that night.
The section of trail above the Echo Lakes is exposed to a lot of sun during the day, which luckily melts a lot of the snow off the trail. The only downside is that some of the melted snow pools up and freezes overnight, making parts of the trail very icy. We didn’t have micro spikes or crampons on this trip, but I could see them being handy for this stretch.
After passing the Echo Lakes, the trail starts getting steeper and the trees eventually closed in on the trail. Up until this area we hadn’t seen that much snow, but in this area we finally hit at least six inches of snow on the trail. This trail doesn’t have blazes on the trees to lead the way so we did a lot of guessing and backtracking to find our way. The good news is that the trail is pretty wide, so it was usually easy to guess which way the trail was heading.
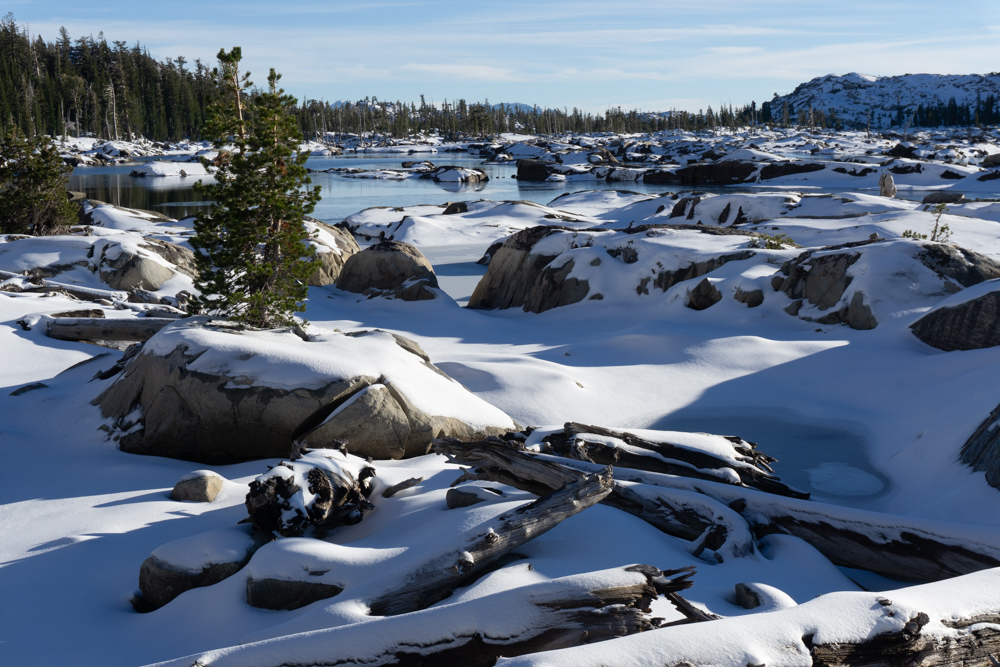
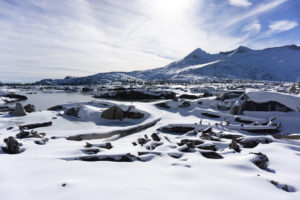
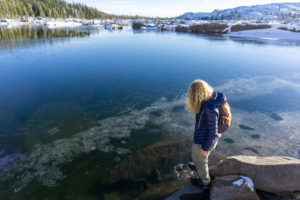
After some navigation (only if you’re doing this in the winter), you’ll hopefully spot a large clearing through the trees — that’s the lake! Lake Aloha has a bunch of branching fingers along its coast, so remember to look down and make sure you’re on solid ground. The snow tends to bunch up around the banks, so we had a bit of a hard time finding the exact edge of the lake.
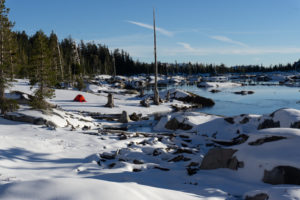
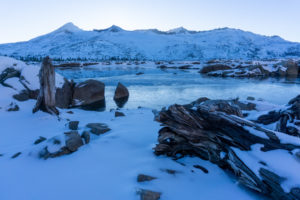
When we got closer to the lake, we decided to explore around the eastern bank for a camping spot. I wanted to camp as close as possible to the lake without risking falling in. The eastern bank of Lake Aloha is especially jagged and has a bunch of little streams flowing into the lake. This made it kind of hard to find good camping on flat ground, but eventually we found a nice, flat snow field right next to the lake.
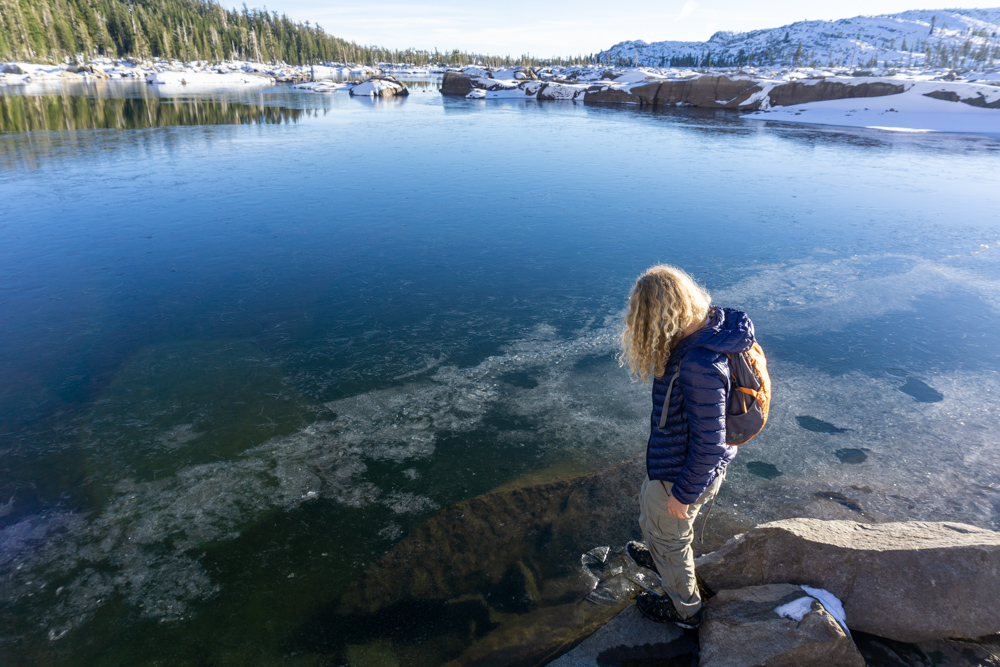
After setting up camp, we continued up the eastern bank and found an area where a bunch of streams feed into the lake. There were a bunch of giant, snow-covered boulders and all the risky rock-hopping Dylan could ask for. Plus, all the rocky geometry and a jumping Dylan made for really fun photography.
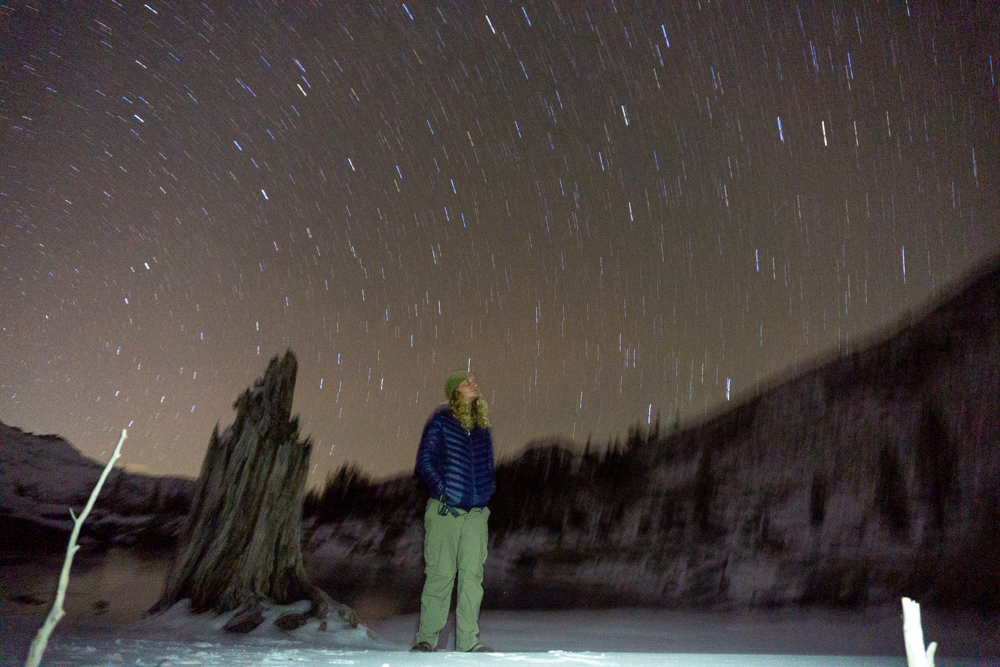
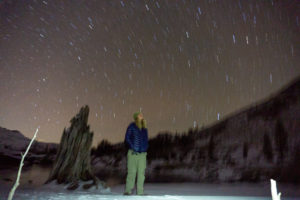
Back at camp after our exploration mission, we cooked a cozy dinner and watched the sun go down across the ridge. The temperature wasn’t even horribly cold at night so we were able to watch the stars come out! The next morning we woke up and uneventfully followed our same trail back to the car.

After the Hike
After we finished our trip, we headed into South Lake Tahoe to check out the town and have some breakfast. The town didn’t leave much of an impression but breakfast at Revive Coffee & Wine was pretty tasty. I honestly don’t remember much of that morning. Sometimes snowy-weather trips take so much out of me that I lose chunks of my memory.
Supply List
The Usual List
Backpack
Tent
Sleeping Bag
Sleeping Pad
Sleeping Bag Liner
Camp Stove
Lighter or Matches
Cooking Pot
Food
Water Vessel
Water Filter
Headlamp
Clothing
Trip Specific Things
{Summer Stuff}
Bear Canister
The park doesn’t make you carry one, but it’s convenient for keeping bears and other forest friends from getting into your food and other smelly things. We use the BearVault BV450 Food Container and we love it. It’s durable, light and fits all of our food for two to three day trips.
Rain Jacket
You’ll be very prepared for the daily 2pm Sierra Nevada thunderstorm.
{Winter Stuff}
Assembling a backpacking kit during the winter is a bit more involved than during the warmer months. Click here, for a full lesson on how to upgrade your regular kit to a winter kit. Here’s a cliff-notes version:
Winter Hiking Trails Map and Strava App or Hiking Project App
Without this map and a back-up app, we’d probably still be wandering around the park. Seriously, winter navigation is hard and you’ll need some good tools to help you figure it out.
Sleeping Pad
We bring our sleeping pads on almost every trip, but it’s extra important to bring a sleeping pad on trips where you’ll be sleeping on snow. The sleeping pad elevates you off the ground and most sleeping pads are made of a material that reflect your body heat back at you. On our first snow trip ever, I had this idea that snow is “soft” and I didn’t need my sleeping pad – don’t be like me. I froze, slept no hours, and it was not fun.
Sleeping Bag Liner
After having a good sleeping pad, the next piece of gear to upgrade for winter travel is your sleeping bag, but good sleeping bags can get expensive. I recommend adding a sleeping bag liner into the mix before upgrading your sleeping bag. Sleeping bag liners can improve the rating on your sleeping bag by 20°F and cost way less than a new sleeping bag.
Four-Season Tent
These are expensive and not 100% necessary, but having a four-season tent does significantly increase comfort on snow trips. We have the Hilleberg Jannu, and this thing insulates and blocks wind almost as good as our actual house. At 7 pounds, it’s also surprisingly light for a four-season tent. It costs a whopping $975, so this is the very last thing we upgraded in our winter backpacking kit.
Hand-Warmers
They’re just so cozy in the morning. We keep a pair of these hand-warmers in our packs year-round just in case the weather gets colder than expected or we need a little extra warmth. We also stick them in our boots on extra cold mornings when our boots freeze overnight.
Thinking about doing this trip? Have any questions? Comment down below!
More Happy Packers
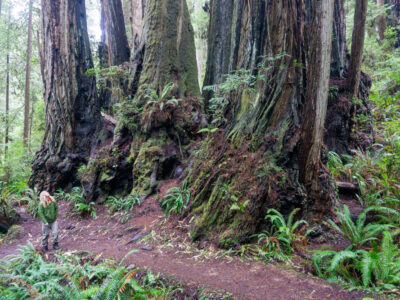
This loop is a tour through the many wonders of Redwood National including the famous big trees, a moody beach, and the mystical Fern Canyon.

This is the perfect any-season beginner trip for anyone wanting to dip their toes in backpacking.
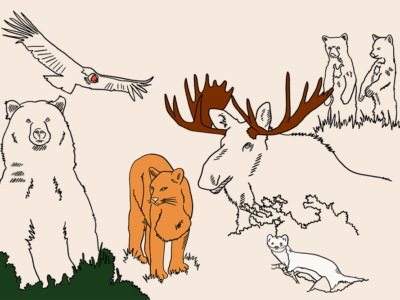
Animals in the wilderness can be scary, but they don’t have to be. Here’s how to feel perfectly at home with the bears and mountain lions.