19 Jan How to Plan a Really Good Backpacking Trip
How-To // Guide
How To Plan a Really Good Backpacking Trip
January 23, 2020

This is my comprehensive, way-too-long guide on how I plan backpacking trips. I don’t take all these steps every single time, but it’s useful to have all the details in one place, especially when you’re starting out. If you have any other tips that you’d like to add or you think I’m doing something dumb, please share in the comments — I’m always down to learn.

General Look-Around Phase
I start out by estimating the amount of driving time we’d like to take on for the trip. If it’s a normal two-day weekend, we stick to around one to three hours of driving in each direction. If we have three or four days, we push it to about six to eight hours of driving. After we have our driving time, I survey adventure websites like The Outbound, Outdoor Project, Alltrails, and Hiking Project to see what kinds of backpacking is in our driving range. I’ll also power up Google Maps, input our home address and scan the map for green areas within our drive time (green usually means the land is public).
At this stage, quantity maters over quality. It’s useful to use websites with large trail databases and lots of pictures. If you’re like me, you may be swayed by the quality of the photos rather than looking at the stuff in the photo. The Outbound plays with my emotions like this all the time. Many of the website’s contributors moonlight as professional photographers who could make a pile of trash look scenic, so I always try to look at the substance of the photo rather than the perfect lighting and composition.
If you want the complete opposite of The Outbound in terms of photography quality, look no further than Alltrails. The users of this site are living proof that the phrase “it was so beautiful, I could just point the camera anywhere,” does not apply to everyone. Marvel at how some people make the most beautiful trails look dull and uninspiring.
Anyways, after the general survey, I narrow my search down to about three or four “areas of interest.” For example, if I start out wanting to backpack 3 hours away from Denver, I would narrow my search to Aspen-Snowmass, northern parts of the Sangre de Cristo Range, and the Steamboat Springs area.
Next, I look up the land regulations in each of the areas and learn about where and when we’re allowed to backpack. If we’re looking at mountainous or high elevation places, I also try to figure out how much snow may be on the ground during our trip.
The last step in location scouting is figuring out whether we need a backpacking permit and how hard it would be to get one. If we don’t need a permit, I simultaneously rejoice and despair. No permits means it’s a lot easier to plan the trip, but it also means the number of people on the trail isn’t restricted by the park. If you couple unrestricted trail access with a popular location, you get backcountry crowd mayhem. The Four Pass Loop in Colorado is the perfect example of this issue. Some camping areas were so crowded that there was no way to get out of earshot from anybody — not to mention the toilet paper and human poop crammed into every forest nook near the campsites.
Crowds
One of the most important things I look at is how crowded the area is and where most day hikers congregate. Then I avoid those areas (if possible). A good way to gage crowd sizes is the amount of information available about your location. If you find a bunch of really good information about your trip, chances are high that a lot of people do that hike. The same goes for the quality of photos in Google Images. If the photos are beautiful, the area is probably going to be very crowded. If they’re all horrible, you’re probably going to be the only one out there.
Many park websites even point out crowded areas and have information about how many people hike the trails. The best managed trails in National Forests even include an estimated usage in their stats sheets for each trail.

Backpacking Permit Deep Dive
If we do need a permit, I launch into investigative mode. Every park has its own unique way of doling out permits. For example, big parks where people backpack a lot, like Yosemite or Rocky Mountain National Park, have sophisticated online permit application and reservation systems that can help you secure a permit for your trip. For the most popular trails in a park, you usually have to apply as early as possible to get a reservation. Each park has its own time frame for accepting applications. For example, Yosemite NP let’s you submit applications 6 weeks before your trip date, while Sequoia-King’s Canyon NP and Rocky Mountain NP accept all applications for the year on March 15th. The earliest park to accept reservations is Grand Teton NP, which accepts applications for the whole year on the first Thursday in January.
If you’re not a reservations person or making a reservation just slipped your mind, the parks usually set aside half of the permits for first-come-first-serve travelers. You can get first-come-first-serve permits the day of your hike at ranger stations and visitors centers. The only risk is that all the permits for your trail might be taken and you’ll have to make a quick change of plans. The best way to make sure you get a permit in this case, is to figure out the earliest time you can get in line and be there bright and early. Beware that some parks let you get a permit the day before your trip and some parks only do same-day reservations.
At other parks where backpacking is less popular, like Joshua Tree or Badlands National Park, you can pick up a permit at the trailhead or Visitors Center. These trips are the easiest to plan because you just show up and go. The only drawback is that some parks that only do first-come-first-serve permits still maintain a maximum quota of people allowed to be in the backcountry. For example, Great Sand Dunes NP and Black Canyon of the Gunnison NP advise backpackers to arrive early (especially on weekends) because they only have a small number of permits and they go fast.
While the National Parks usually have well-documented (although sometimes complicated) steps for getting permits, other wilderness stewards like the Bureau of Land Management (aka BLM) and the National Forestry Service (NFS) absolutely do not. The good news is that you usually don’t need a permit to hike these lands; the bad news is that when you do need a permit, it can be really hard to understand how to get one. Best-case scenario is that it’s as easy as self-registering at a trailhead kiosk and carrying your self-issues permit with you on the hike.
The NFS usually has a stats sheet for all their trails including a section on permits. The permit section will usually tell you if you need a permit and link you to instructions for how to get one. The most popular NFS parks have formal permit reservation processed just like national parks. Sometimes you just have to call the rangers to find out more information.
To make things even murkier, sometimes land belongs to two different owners and while one might not have permit requirements, the other one does. For example, the Lost Coast belongs to the BLM but is also part of the King Range National Conservation Area. Even though you don’t need a permit in BLM land, you do need a permit for the Conservation Area.
Picking a trail
The first step in picking a trail is to find a good map. National parks always have perfect, easy to use maps on their websites. Some parks even make special backpackers’ maps that have more information about camping zones, trailheads, and areas where you can and can’t have fires. At the opposite end of the spectrum, national forests and BLM land pretty much never have good maps online. You’ll either have to rely on other online resources or paper maps for planning and navigation.
If I can’t find an official map for our trip, I open up a whole bunch of other map-based websites. I usually use a combination of Google Maps, Hiking Project and Strava. My favorite one lately has been Hiking Project by REI because it has a good collection of trails and it gives you trail distances and elevation. They also have an app which lets you download maps for backcountry navigation.
If I’m having trouble coming up with hiking distances on Hiking Project, I’ll also look for trailheads on Google Maps and see if Google has any record of trails in the area. I’ve noticed that Google comes through with trail information about fifty percent of the time.
Once I find a couple trailheads, I open up the Strava Route Builder and start drawing routes from the trailheads. Strava has its own storage of trail information that it doesn’t display on its main map. You’ll have to select a start point on the map and then click around to locate the trail. If you don’t find anything, your trail is sadly not on Strava. This has only happened to me once for a trip in the Holy Cross Wilderness in Colorado. Otherwise, I think they have a pretty good bank of trail info. In the Route Builder, you can also see the elevation profile of your trail, but it tends to underestimate elevation gain if the trail is very steep. Additionally, in the phone app, you can download your custom route for backcountry navigation.
For those super off-the-grid parks you may have to Google the park and see if anyone has put up a route description or their own GPS coordinates. For example, the Trinity Alps Wilderness in Northern California has absolutely no trail information on Google Maps or Strava, but if you do a general search, you’ll find that a lot of bloggers have collected waypoints on the most popular trails. I’m not the best at working with waypoints but I know that you can upload them into a handheld GPS and go from there.
After I find a good map, I pick out a couple trails that look good in each park and investigate the trails in more detail. I break out Google Maps again and turn on the 3D satellite view. To turn on 3D satellite view, you have to turn on satellite view in the bottom left corner and then click the 3D button (it looks like a squiggle inside a circle) in the bottom right corner. Then you can pan and rotate the map to get a better look at the topography.
Then, I find the trailhead on the 3D map (harder than it seems) and follow along the trail to get a preview of the terrain we’d be hiking. One of the most important things I try to find is where the tree line sits and compare it to how much of the trail is above the tree line. My favorite trips are the hikes where most of the trail is above tree line. The trails tend to be steeper but the views and great camping spots are hard to pass up. The easiest way to find the tree line is to look for a sharp transition between dark green trees and grey-ish rock. You can also try to look for a tree to grass transition but it’s a bit harder.
On the other hand, if the main feature of the park is the trees, like in Redwood National Park, I don’t bother looking at satellite maps because it doesn’t matter where the tree line is. I also use 3D satellite maps to look at the steep-ness of the terrain. Looking at steep-ness is most important on loop hikes, where we can change our loop direction to avoid super steep decents. I would way rather burn my thighs out on a steep scent than feel like I’m falling off the world on a steep decent.
After all the information gathering, I’ve usually narrowed it down to two or three trails per park. Now it’s time to get Dylan involved. I corner him in a location where he can’t escape (like while he’s eating dessert) and show him the best photos I’ve been able to find of the trails in question. I go back and forth between the different photos like a vision test until he expresses a preference. If the types of hikes are very different, like desert vs mountain, he usually has a preference; otherwise, he says it’s up to me and goes back to eating.
If I get to choose the trail, I weight the pros and cons of each trail based on elevation gain, camping spots, scenery of the hike, trail crowded-ness and ease of getting a permit. I land on one trail and start the prep work for the trip. I also keep a backup trail in mind just in case we can’t do the original trip.
Pre-trip preparations
If the trail I’ve chosen requires a permit, I start that process right away. If I’m outside the window when the park accepts permit applications, I mark the date for when they will be accepting applications and wait patiently. If I’m within the application window but find out that the trail quota is full, I weigh the risks of trying to get a first-come-first-serve permit. For example, if we’re traveling far away for a special trip, I usually like to have a permit reservation so we don’t have to scramble around for an alternative hike if things don’t work out. However, if the trip is local, we can usually take that risk and hike something else in the area. Especially because I know the area a lot better if we stay at our local parks.
If we’re hiking with friends, I also tend to avoid risks when it comes to permits because I want the trip to be as uncomplicated as possible. I’m usually also stubbornly committed to delivering the trip I’ve promised, so first-come-first-serve permits don’t fit in the plan.
If we decide not to take the permit risk, I throw a micro-tantrum about how crowded the backcountry is getting and then mark the first application day on my calendar for next year. If you’re anything like me, after missing out on some epic trips because of permits, you’ll get extremely diligent about applications and pretty much develop a sixth sense for when you have to apply. There’s actually a couple bloggers that have chronicled all the major permit deadlines so that you don’t have to suffer anymore. Here’s my favorite.
After dealing with permits, the only things left to do are to get fit enough to do the hike and to start packing!
Have any super secret trip-planning trips? Leave a comment down below!
More Happy Packers
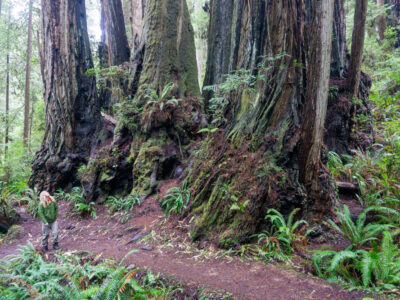
This loop is a tour through the many wonders of Redwood National including the famous big trees, a moody beach, and the mystical Fern Canyon.

This is the perfect any-season beginner trip for anyone wanting to dip their toes in backpacking.
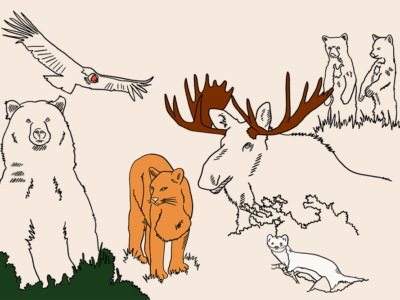
Animals in the wilderness can be scary, but they don’t have to be. Here’s how to feel perfectly at home with the bears and mountain lions.